The Samsung RF28HMEDBSR/AA French Door Refrigerator, 28.15 cu.ft, features Twin Cooling Plus and a 10‑lb/day ice maker. The Quick Guide (DA99‑04022A‑19.pdf) outlines setup, controls, and maintenance. Its sleek design and spacious interior make it a kitchen essential Its compressor boosts daily
Model Overview and Specifications
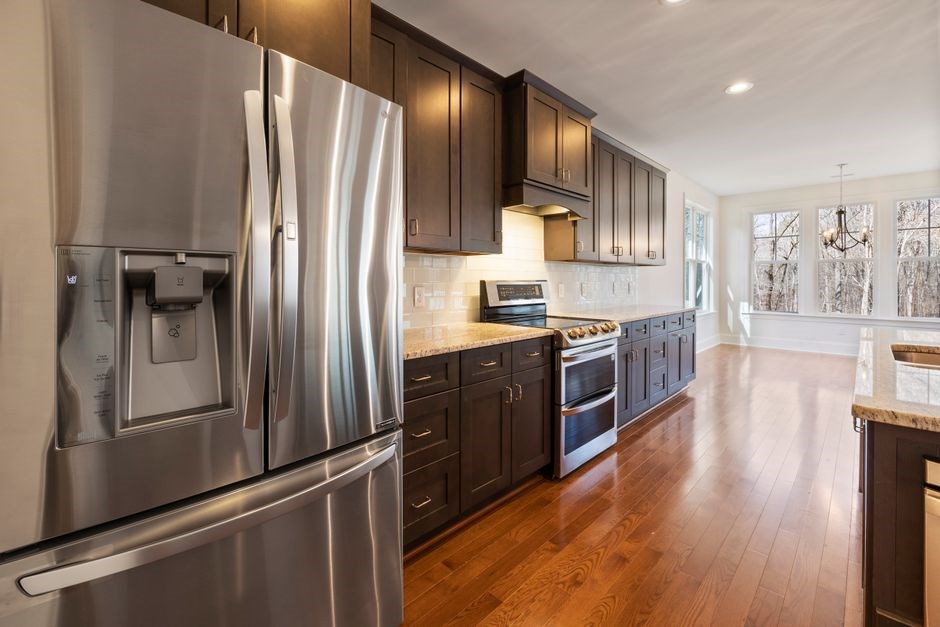
The Samsung RF28HMEDBSR/AA is a 28.15‑cubic‑foot French‑door refrigerator, measuring 36 inches wide and 70 inches tall. It incorporates Twin Cooling Plus technology, which uses separate evaporators for the fridge and freezer compartments to maintain optimal humidity and temperature. The appliance features a 10‑pound‑per‑day ice maker with a 4.2‑pound storage capacity, and a built‑in water dispenser that delivers filtered water and ice cubes on demand. The interior layout includes a spacious main compartment with adjustable shelves, a full‑size door‑in‑door pantry, and a dedicated freezer section with a 3‑door configuration. The RF28HMEDBSR/AA also offers a 3‑zone temperature control system, allowing users to set distinct temperatures for the main fridge, upper shelf, and freezer. Additional specifications: 1.5‑ton compressor, 24‑hour energy‑efficiency rating, LED interior lighting, and a digital control panel with a 7‑inch touchscreen. The unit’s dimensions are 36.0″ W × 70.0″ H × 31.0″ D, and it weighs approximately 280 lbs. Warranty coverage includes a 1‑year limited parts warranty and a 10‑year limited warranty on the compressor. The refrigerator’s energy efficiency is rated at 2.5 kWh per day, meeting ENERGY STAR® criteria. It includes a 3‑zone temperature control with a digital display, a 7‑inch touchscreen, and a 1.5‑ton compressor. The unit’s dimensions are 36.0″ W × 70.0″ H × 31.0″ D, and it weighs approximately 280 lbs. It features a built‑in water filter with a 90‑day filter life, a 10‑pound‑per‑day ice maker, and a 4.2‑pound storage bin. The RF28HMEDBSR/AA is available in French‑door style with a black stainless‑steel finish and a 3‑door freezer configuration. Warranty coverage includes a 1‑year limited parts warranty and a 10‑year limited warranty on the compressor. Smart‑connect app included. Auto‑cleaning dispenser.
Key Features and Design Highlights
Its quiet, whisper‑quiet motor ensures a serene environment even during late‑night use, while the integrated water filter delivers clean, great‑tasting water for drinking and cooking. With SmartThings integration, you can receive alerts, monitor temperature, and control settings remotely from your smartphone or tablet, making kitchen management effortless. Its flexible door‑in‑door pantry can double as a mini‑fridge, giving you space for beverages or snacks. Its finish resists fingerprints, keeping the appliance looking new!!! The refrigerator’s interior is thoughtfully organized with a dedicated freezer that can be set to a lower temperature for frozen foods, while the main compartment’s adjustable shelves accommodate a range of containers, from tall bottles to wide trays. Its advanced humidity control keeps produce crisp and extends shelf life, making it ideal for busy households. The RF28HMEDBSR/AA also features a flexible door‑in‑door pantry that can double as a mini‑fridge, providing extra space for beverages or snacks. Its sleek, minimalist aesthetic complements any kitchen décor, while the integrated water filter ensures clean, great‑tasting water for both drinking and cooking. With SmartThings integration, you can receive alerts, monitor temperature, and control settings remotely from your smartphone or tablet, making kitchen management effortless. Enjoy the convenience and style of Samsung’s refrigeration! 10‑year compressor warranty backs features!

Quick Start Guide
Unbox the RF28HMEDBSR/AA, place it 12 inches from walls, connect the power cord, and let it idle 30 minutes. Press the Power button, set temperature to 4°C, and enable SmartThings for remote alerts. Check the water filter status before first use. Keep the door closed for the first hour to stabilize!
Unboxing and Initial Setup
Begin by carefully removing the RF28HMEDBSR/AA from its packaging. Inspect the outer carton for any visible damage; if found, contact Samsung support before proceeding. Inside, you’ll find the refrigerator, a quick‑start guide (DA99‑04022A‑19.pdf), a water filter, and a set of mounting brackets. Unpack the unit onto a flat, level surface, ensuring it is positioned at least 12 inches from walls and any obstructions to allow proper airflow. Use the included brackets to secure the appliance to the floor if desired, following the instructions in the guide. Next, connect the 240‑V power cord to a grounded outlet, ensuring the plug is fully seated. Allow the refrigerator to idle for 30 minutes before opening the doors. During this period, the compressor will reach operating temperature and the internal sensors will calibrate. Once idle, press the Power button on the control panel to turn on the unit. Set the temperature to 4 °C (39 °F) for the fridge and 0 °C (32 °F) for the freezer. Verify that the display shows the correct settings. Finally, install the water filter by inserting it into the filter housing located in the upper right corner of the fridge compartment; turn the filter knob clockwise until it locks. If your model supports SmartThings, open the Samsung SmartThings app, add the refrigerator, and follow the on‑screen prompts to connect via Wi‑Fi. After completing these steps, your RF28HMEDBSR/AA is ready for use.
During the unboxing process, keep a clean workspace and use a microfiber cloth to wipe any dust from the appliance. Verify that all accessories listed in the quick‑start guide are present, including the water filter, the temperature control panel, and the user manual. Label the water filter with the date of installation for future reference. If you encounter any missing parts, contact Samsung customer service immediately. Finally, ensure the refrigerator is level by adjusting the rear legs as needed. This will guarantee optimal performance and longevity of the appliance.
Connecting to Power and Placement Tips
Before connecting the RF28HMEDBSR/AA to power, position it on a level floor and allow a clearance of at least 12 inches from the rear wall and 3 inches from the sides. The unit’s 240‑V power cord should be plugged into a dedicated, grounded outlet; avoid using extension cords or power strips. Ensure the outlet’s voltage rating matches the appliance’s specifications. Once the cord is secure, press the Power button on the control panel to activate the refrigerator. The display will show “Ready” after a brief startup sequence. Verify that the temperature settings are correct—4 °C for the fridge and 0 °C for the freezer. If the unit does not power on, double‑check the outlet’s functionality with another device and inspect the cord for damage. For optimal performance, keep the refrigerator away from heat sources such as ovens or direct sunlight. Additionally, avoid placing it near magnetic appliances that could interfere with the control panel. Finally, confirm that the door seals are intact and the doors close firmly to maintain energy efficiency.
Ensure the outlet’s voltage rating matches the appliance’s specifications. Once the cord is secure, press the Power button on the control panel to activate the refrigerator. The display will show “Ready” after a brief startup sequence. Verify that the temperature settings are correct—4 °C for the fridge and 0 °C for the freezer. If the unit does not power on, double‑check the outlet’s functionality with another device and inspect the cord for damage. For optimal performance, keep the refrigerator away from heat sources such as ovens or direct sunlight; Additionally, avoid placing it near magnetic appliances that could interfere with the control panel. Finally, confirm that the door seals are intact and the doors close firmly to maintain energy efficiency.
If the unit does not power on, double‑check the outlet’s functionality with another device and inspect the cord for damage. For optimal performance, keep the refrigerator away from heat sources such as ovens or direct sunlight. Additionally, avoid placing it near magnetic appliances that could interfere with the control panel. Finally, confirm that the door seals are intact and the doors close firmly to maintain energy efficiency.
For safety, never place the refrigerator on a soft surface such as a rug, as this can obstruct airflow and cause overheating. Keep the unit’s vents clear of any obstructions, and avoid stacking heavy items on top. Samsung provides a limited 10‑year warranty on the compressor and a 5‑year warranty on parts; refer to the warranty card for details. Additionally, consult the user manual for maintenance schedules and troubleshoot tips now.

Operating Instructions
Use the touch‑pad to set temperature, cycle mode, and timers. Press the Ice button to start the ice maker. The water dispenser is activated by the water button. Refer to the Quick Guide for detailed settings and safety warnings; Set Auto defrost for energy savings and keep door seals tight. now!!
Control Panel and Settings
The Samsung RF28HMEDBSR/AA features a capacitive touch panel located on the front door. The panel displays the current temperature, mode, and status indicators. Press the Temp button to cycle through preset ranges: Cold (0°C), Cool (4°C), Warm (8°C), and Heat (12°C). The Mode button toggles between Auto, Manual, and Eco settings. In Auto, the unit adjusts temperature based on ambient conditions; Manual locks the selected temperature; Eco reduces compressor run time for energy savings.
To activate the Ice Maker, tap the Ice icon. The icon lights amber when the ice bin is full and green when ice is available. The Water Dispenser is accessed by pressing the Water button; a clear water flow appears after a short delay. The Door Alarm can be enabled or disabled via the Alarm button, which toggles between On and Off states.

Advanced settings are available through the Menu button. Navigate using the arrow keys to adjust Defrost cycles, Humidity controls, and Energy Saving parameters. The Reset function restores factory defaults. For safety, always ensure the unit is unplugged before accessing the back panel.
Calibration can be performed by holding the Temp button for 3 seconds until the display blinks. Follow on‑screen prompts to set the desired temperature. If the display shows an error code (e.g., 0x01), refer to the error code list in the Quick Guide. Common issues include a frozen door seal or a malfunctioning sensor, which can be resolved by cleaning the seal with warm, soapy water and inspecting the sensor for debris.
Power consumption can be monitored via the Energy icon, which displays estimated monthly usage. Adjusting the Defrost interval from Auto to Manual can reduce frost buildup. The unit’s SmartThings integration allows remote monitoring and control through the Samsung app, enabling temperature adjustments, ice maker status, and energy reports from anywhere.
For optimal performance, keep the unit level by adjusting the feet. Check the airflow vents on the back; clear any obstructions. The RF28HMEDBSR/AA’s dual evaporators maintain consistent temperature across compartments, ensuring food stays fresh. Follow the Quick Guide for detailed maintenance schedules.
The Samsung RF28HMEDBSR/AA’s capacitive touch panel, located on the front door, displays current temperature, mode, and status indicators. Pressing the Temp button cycles through preset ranges: Cold (0 °C), Cool (4 °C), Warm (8 °C), and Heat (12 °C). The Mode button toggles between Auto, Manual, and Eco settings. In Auto, the unit adjusts temperature based on ambient conditions; Manual locks the selected temperature; Eco reduces compressor run time for energy savings.
To activate the Ice Maker, tap the Ice icon; the indicator lights amber when the bin is full and green when ice is ready. The ice maker uses a 4‑inch water inlet that connects to a standard kitchen faucet. A 1‑inch hose with a filter is recommended for optimal water quality. The Water button opens the dispenser, delivering clear water after a brief delay. The dispenser can be positioned on the left or right side of the door. The water flow is adjustable by turning the Water Level dial on the back of the unit: High for a stronger stream, Low for a gentler flow.
Maintenance of the ice maker and dispenser involves regular cleaning of the water filter, which should be replaced every 90 days or when the indicator turns red. To clean the filter, remove the filter housing, rinse under running water, and reinstall. The ice bin should be emptied and wiped with a damp cloth weekly to prevent mold growth. When the ice maker is not producing ice, check the water supply line for kinks or blockages and ensure the water valve is fully open. If the ice maker still fails, inspect the internal sensor for debris; a gentle wipe with a soft brush can resolve most issues. The dispenser may show a red light if the water line is clogged; flushing the line with a small amount of bleach can clear the blockage.
For energy efficiency, the RF28HMEDBSR/AA’s Twin Cooling Plus system keeps the ice maker’s temperature consistent, reducing frost buildup. The unit’s automatic defrost cycle runs every 3–4 days, ensuring the ice maker remains operational. Users can monitor ice production via the SmartThings app, receiving notifications when the bin is full or when the water filter needs replacement. The ice maker’s internal thermostat is calibrated to maintain a temperature of 0 °C, ensuring crisp, bite‑size cubes. Users can customize the ice size by selecting the Cube Size option, choosing between Small, Medium, and Large. The dispenser’s water filter is a 0.5‑micron cartridge that removes chlorine and sediment, guaranteeing clean, fresh‑tasting water. When the filter’s lifespan ends, the indicator will flash red, prompting a replacement. The RF28HMEDBSR/AA also includes a child lock feature; pressing the Lock button disables the ice maker and dispenser until unlocked, preventing accidental spills. For troubleshooting, consult the Quick Guide’s error code list, which covers common issues such as 0x02 (water line error) and 0x03 (ice maker sensor fault). To ensure optimal performance, keep the unit’s water inlet at a level no higher than the top of the refrigerator to avoid backflow. The ice maker’s water inlet valve is located on the back panel; a 1‑inch hose can be connected to a 3/4‑inch supply line. The dispenser’s water outlet is positioned 12 inches above the floor, allowing easy access for all users. The RF28HMEDBSR/AA’s smart thermostat can be set via the SmartThings app, enabling remote monitoring of ice and water status, and receiving alerts for maintenance reminders.
Maintenance and Cleaning

Keep the RF28HMEDBSR/AA pristine by wiping the exterior with a damp cloth and mild detergent. Inside, empty the ice bin weekly, clean the water filter monthly, and run a defrost cycle every 3–4 days; Inspect door seals for gaps, and replace any worn gasket to maintain efficiency. Check the drain tube. tube.
Regular Cleaning Schedule
Maintaining the RF28HMEDBSR/AA’s performance hinges on a disciplined cleaning routine. Follow this calendar to keep the fridge, freezer, and accessories operating at peak efficiency.
- Weekly: Empty the ice bin, wipe the interior surfaces with a mild, non‑abrasive cleaner, and vacuum the door seals to remove crumbs.
- Monthly: Replace the water filter, clean the water dispenser reservoir, and inspect the evaporator coils for dust buildup.
- Quarterly: Run the built‑in defrost cycle, clean the drain pan, and check the temperature sensors for accuracy.
- Bi‑annual: Remove the removable shelves and drawers, wash them in warm soapy water, and re‑install after drying.
- Yearly: Conduct a full system check: verify door gasket integrity, test the compressor, and schedule a professional service if any anomalies arise.
Adhering to this schedule not only prolongs the appliance’s lifespan but also ensures food stays fresher, and the ice maker continues to produce up to 10 pounds of ice daily.
Remember to check the door seal for gaps before each cleaning cycle; a tight seal improves energy efficiency. Store items in clear bins to monitor inventory and reduce waste. If the fridge shows unusual noises, pause cleaning and consult the troubleshooting guide.
Follow this schedule to keep your refrigerator running smoothly daily.
Cleaning the Interior and Components
Start by unplugging the unit. Remove all food items and place them in a cooler. Take out removable shelves, drawers, and the ice bin. Wash these parts in warm, soapy water, rinse, and dry thoroughly before re‑installing. Wipe the walls, door panels, and the evaporator coils with a soft very cloth dampened with a mild cleaner; avoid abrasive pads that could damage the finish!!
Clean the water dispenser reservoir by filling it with a mixture of one tablespoon vinegar to one cup water, let sit 10 minutes, then rinse. For the ice maker, remove the ice storage bin, empty it, and scrub with a soft brush. Check the drain tube for clogs; gently flush with a turkey baster if needed. Inspect the door seals for cracks or wear; replace if necessary. Finally, wipe the exterior, especially the control panel, with a damp cloth and dry with a lint‑free towel. Plug the fridge back in, set the temperature to 37°F (3°C) for the fridge and 0°F (-18°C) for the freezer, and allow it to stabilize before restocking.
After cleaning, inspect the condenser coils for dust accumulation; a clean condenser improves efficiency. If the fridge’s temperature fluctuates, check the thermostat setting and ensure the door seals are snug. For optimal performance, keep the fridge at a 5‑inch clearance from walls and avoid blocking vents. Store items in organized bins to maintain airflow and reduce energy usage. This reduces power usage and keeps the fridge efficient. Regularly cleaning the coils and ensuring proper airflow can cut energy costs by up to 10%.
Troubleshooting Common Issues
Check power, reset, inspect coils, clean drain, verify door seals, test ice maker, adjust temperature, consult manual, contact support. If issues persist, check error codes, inspect compressor, and refer to manual. Contact Samsung support for assistance!
Power and Display Problems
When the RF28HMEDBSR/AA fails to power or the display remains blank, start with these diagnostic steps:

- Check the outlet: Ensure the unit is plugged into a functioning socket and that the circuit breaker hasn’t tripped.
- Inspect the power cord: Look for frayed wires or visible damage; replace if necessary.
- Reset the refrigerator: Unplug for 60 seconds, then plug back in to clear any temporary faults.
- Verify the temperature settings: Incorrect settings can trigger a low‑power mode that dims the display.
- Examine the control panel: A stuck button or moisture on the panel can cause a false error; clean gently with a dry cloth;
- Look for error codes: The display may show a code (e.g., “E3” or “E5”). Refer to the Quick Guide for code meanings.
- Check the compressor: A non‑operational compressor often results in a blank display; listen for clicking or humming.
- Inspect the door seals: Leaking seals can cause rapid temperature changes, prompting the system to shut down.
- Consult the service manual: For advanced diagnostics, review the Samsung RF28HM Series Service Manual PDF.
- Contact Samsung support: If all else fails, reach out to the CA support line or schedule a technician visit.
Document any error codes and steps taken before calling support to expedite troubleshooting. Stay safe!!
Cooling and Ice Production Issues
When the RF28HMEDBSR/AA fails to maintain proper temperature or the ice maker stalls, follow these steps:
Verify that the door seals are intact; a compromised seal can cause rapid heat influx, reducing cooling efficiency.
Inspect the condenser coils for dust buildup. Clean them with a coil brush or vacuum to restore airflow.
Ensure the evaporator fan is running. A silent fan indicates a motor issue that must be replaced.
Check the water inlet valve for proper operation. A partially closed valve limits water flow, affecting ice production.
Confirm that the ice maker’s internal temperature sensor reads correctly; a faulty sensor can trigger a low‑temperature shutdown.

Examine the ice bin for blockages; a jammed bin can prevent ice from forming.
Verify that the refrigerator’s temperature settings are within the recommended range (38–40 °F for the fridge, 0 °F for the freezer).
If the unit displays an error code (e.g., “E4” for compressor or “E5” for ice maker), consult the Quick Guide for resolution steps.
When all else fails, schedule a service appointment with Samsung support to inspect internal components such as the compressor, thermostat, and ice maker assembly.
Regular maintenance and prompt troubleshooting will keep the RF28HMEDBSR/AA’s cooling and ice production running smoothly.
For performance, keep the door hinges lubricated and ensure the fridge is level on the floor daily !