Silverton offers a paradise for hikers and outdoor enthusiasts‚ with its scenic trails like Ice Lake and Highland Mary Lakes. PDF guides provide essential navigation‚ detailed maps‚ and trail information‚ making them indispensable for planning adventures in this stunning Colorado region.
1.1 Overview of Silverton Trails
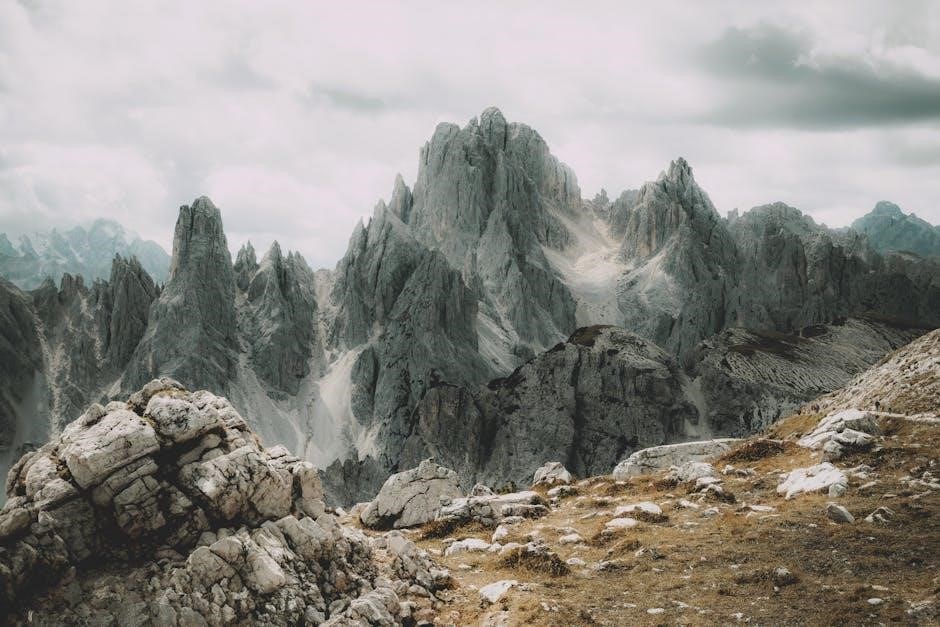
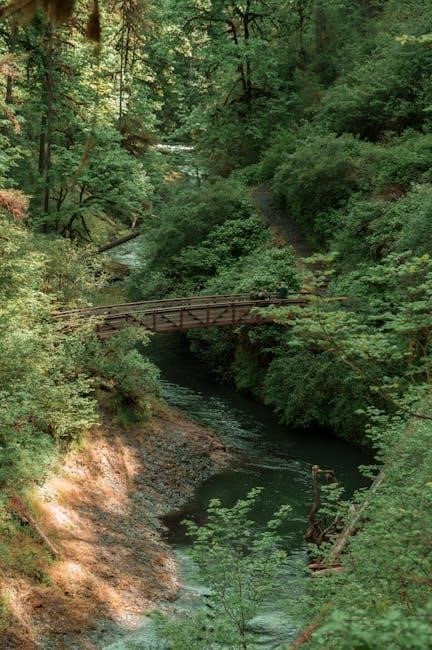
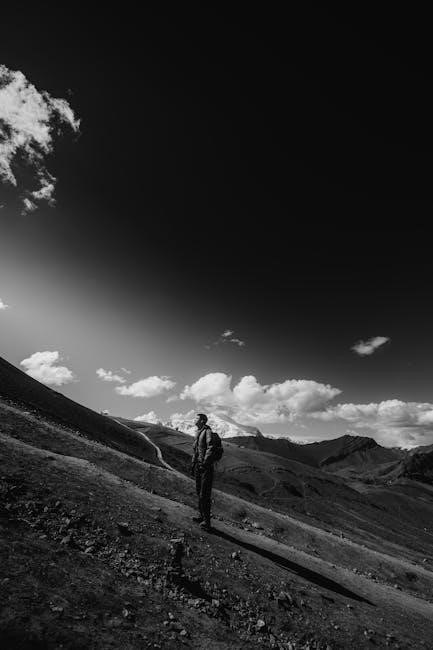
Silverton‚ Colorado‚ is renowned for its diverse and scenic trail network‚ offering adventures for hikers‚ bikers‚ and off-road enthusiasts. Trails range from easy day hikes to challenging multi-day treks‚ winding through alpine meadows‚ dense forests‚ and rugged mountain peaks. Popular routes like the Ice Lake and Highland Mary Lakes trails attract visitors worldwide‚ while lesser-known paths provide solitude and untouched natural beauty. The area is also a hub for motorized recreation‚ with designated routes for ATVs and 4×4 vehicles. PDF guides are essential for navigating these trails‚ as they provide detailed maps‚ elevation profiles‚ and essential information for a safe and enjoyable experience; Silverton’s trails are a gateway to the San Juan Mountains’ breathtaking landscapes and rich outdoor opportunities.
1.2 Importance of PDF Guides for Trail Navigation
PDF guides are indispensable for navigating Silverton’s trails‚ offering detailed maps‚ GPS waypoints‚ and trail descriptions. These guides provide essential information such as trail lengths‚ elevation gains‚ and directions‚ ensuring hikers stay on track. They often include markers for water sources‚ campsites‚ and scenic viewpoints‚ enhancing the overall experience. PDF formats are easily downloadable‚ making them accessible offline‚ a crucial feature in areas with limited cellular coverage. Additionally‚ these guides highlight potential hazards and regulatory information‚ promoting safety and compliance with local rules. For both seasoned adventurers and first-time visitors‚ Silverton PDF trails guides are a must-have resource for a well-prepared and enjoyable journey through Colorado’s stunning landscapes.
Popular Silverton Trails
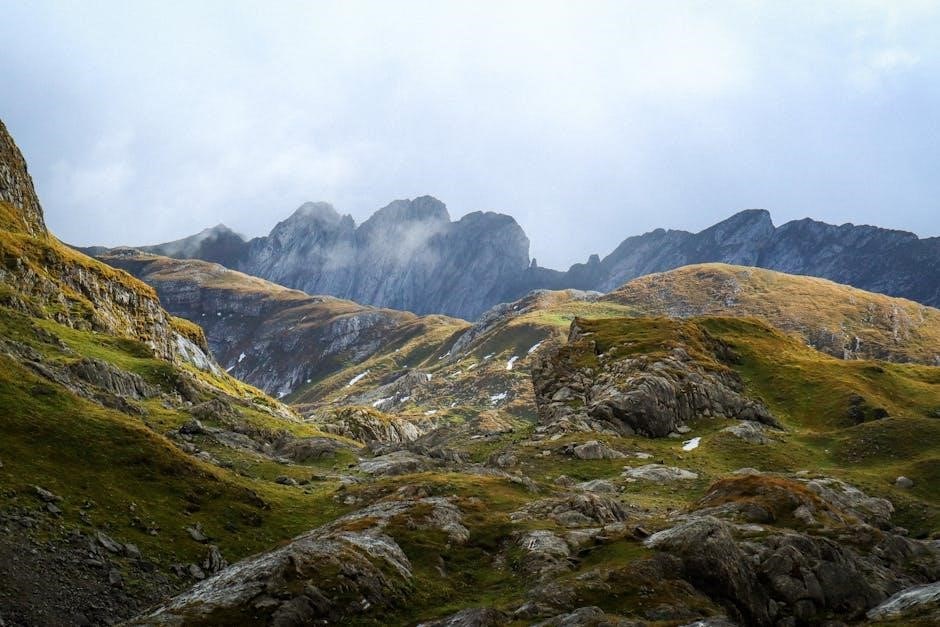
Silverton boasts iconic trails like Ice Lake and Highland Mary Lakes‚ known for stunning alpine scenery and challenging terrain. These routes attract hikers seeking breathtaking Colorado vistas.
2.1 Ice Lake Trail
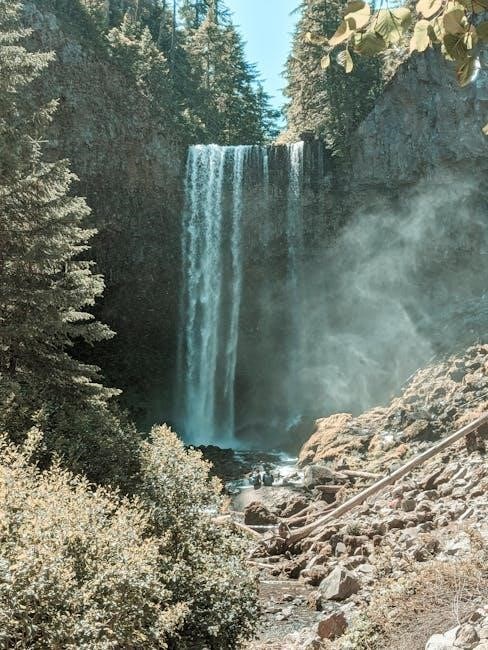
The Ice Lake Trail is one of Silverton’s most celebrated routes‚ renowned for its vibrant turquoise alpine lake and panoramic views of surrounding peaks. This moderate 3.5-mile hike gains 2‚400 feet in elevation‚ offering a rewarding challenge. The trailhead is accessible near the South Mineral Campground‚ and hikers often combine this trail with others for a full-day excursion. Wildflowers in summer and golden aspens in fall make it a year-round favorite. PDF guides provide detailed maps and tips‚ ensuring hikers are well-prepared for the adventure. Its popularity stems from the breathtaking scenery that makes every step worthwhile. Many consider it a must-do hike in Colorado.
2.2 Highland Mary Lakes Trail
The Highland Mary Lakes Trail is a stunning 8-mile out-and-back route near Silverton‚ Colorado‚ offering breathtaking views of alpine lakes and surrounding mountain peaks. Known for its challenging terrain‚ the trail gains over 2‚000 feet in elevation‚ making it a favorite among experienced hikers. The route features multiple lakes‚ each more picturesque than the last‚ and abundant wildlife. Visitors often combine this hike with others in the area for a full-day adventure. PDF guides provide detailed maps and navigation tips‚ helping hikers explore the trail’s natural beauty. With its pristine landscapes and serene atmosphere‚ Highland Mary Lakes Trail is a must-visit destination for outdoor enthusiasts.
2.3 Other Notable Trails Near Silverton
Beyond Ice Lake and Highland Mary Lakes‚ Silverton boasts an array of other exceptional trails that cater to diverse hiking preferences. The Colorado Trail segment near Silverton offers a mix of challenging terrain and panoramic vistas‚ while the Two Smokes Trail provides a shorter yet equally rewarding experience. For those seeking more remote adventures‚ the Dolores Trail and Rico-West Dolores Trail promise solitude and untouched natural beauty. These trails‚ along with others‚ are meticulously documented in Silverton’s PDF trail guides‚ ensuring hikers have access to detailed maps and essential information. Whether you’re a seasoned explorer or a casual wanderer‚ Silverton’s diverse trail network has something to offer every outdoor enthusiast.
Planning Your Silverton Trail Adventure
Planning your Silverton trail adventure involves downloading detailed PDF maps‚ packing essential gear‚ obtaining necessary permits‚ and checking weather conditions to ensure a smooth and enjoyable experience.
3.1 Downloading Silverton Trail Maps in PDF
Downloading Silverton trail maps in PDF format is a crucial step for a well-prepared adventure. These maps provide detailed route information‚ elevation profiles‚ and waypoints‚ ensuring accurate navigation. Official websites like the USFS or local tourism boards offer downloadable versions. The PDFs are customizable‚ allowing hikers to zoom in on specific sections or print sections as needed. Many maps are GPS-compatible‚ enhancing your ability to track progress in real-time. Additionally‚ these guides often include tips on environmental guidelines and safety precautions‚ making them an essential resource for both novice and experienced hikers. Ensure you download the latest version before your trip to stay informed about trail conditions and updates.
3.2 Essential Gear for Hiking in Silverton
Hiking in Silverton requires careful preparation with the right gear to ensure a safe and enjoyable experience. Sturdy‚ waterproof hiking boots or shoes are a must due to uneven and potentially wet terrain. Layers of breathable clothing are essential‚ as Colorado weather can change rapidly. A hydration pack or reusable water bottle is vital for staying hydrated‚ while energy-rich snacks and a lightweight lunch keep your energy levels up. Don’t forget a map‚ compass‚ and GPS device‚ as cell service can be unreliable. Sunscreen‚ a hat‚ and sunglasses protect against high-altitude sun exposure. A first-aid kit and emergency shelter are also crucial for unexpected situations. Always check trail conditions before heading out.
3.3 Obtaining Necessary Permits and Passes
Exploring Silverton’s trails requires proper permits to ensure compliance with local regulations. For most trails‚ a free self-issue permit is available at trailheads‚ while overnight camping may need a permit from the USFS or BLM. Motorized vehicle access requires a pass‚ obtainable at local ranger stations. Camping in designated areas often involves restrictions‚ so check with the San Juan National Forest or Bureau of Land Management for specific rules. Partnerships with organizations like the Hardrock Hundred and San Juan County help maintain trail access‚ but it’s your responsibility to secure the right passes before heading out. Always verify requirements before your trip.
3.4 Weather and Best Time to Visit
Silverton’s weather is characterized by cold winters and mild summers‚ making late spring to early fall the best time for hiking. Summer months offer wildflowers and warmer temperatures‚ while autumn brings vibrant foliage. Be prepared for unpredictable mountain weather‚ with sudden rainstorms possible. Winter adventures require specialized gear due to heavy snowfall. Check local forecasts before heading out‚ as trail conditions can change rapidly. The ideal visiting period for most trails is July to September‚ ensuring accessible routes and optimal scenic beauty. Plan your trip according to the season and stay informed about weather patterns to maximize your Silverton trail experience safely.
Silverton Trail Regulations
Silverton trails require adherence to specific rules‚ including permits for camping and restrictions on motorized vehicles. Always follow environmental guidelines to preserve the area’s natural beauty.
4.1 Rules for Motorized Vehicles on Trails
Motorized vehicles on Silverton trails must adhere to strict regulations to protect the environment and ensure safety. Trails are managed by agencies like the USFS and BLM‚ with specific routes designated for motorized use. Off-road vehicles must stay on marked paths‚ and OHV staging areas are provided for convenient access. Permits are often required for motorized access‚ and operators must follow noise and speed limits. Licensed vehicles are allowed on state highways and county roads‚ but unlicensed ones are restricted to designated trails. Violations can lead to fines and environmental damage‚ so it’s crucial to follow these rules to preserve Silverton’s natural beauty and ensure sustainable trail access.
4.2 Permits and Restrictions for Camping
Camping in Silverton’s wilderness areas requires adherence to specific regulations to preserve the environment and ensure public safety. Permits are often mandatory for overnight stays‚ particularly in designated campsites or sensitive habitats. These permits can typically be obtained through local ranger stations or online platforms. Restrictions may include limits on campsite stays‚ prohibitions on open fires‚ and requirements for proper waste disposal. Campers must also stay on designated trails and avoid sensitive ecosystems. Failure to comply with these rules can result in fines and damage to the area’s natural beauty. It’s essential to check with local authorities for up-to-date information before planning your camping trip.
4.3 Environmental Guidelines and Safety Tips
Exploring Silverton’s trails requires a commitment to environmental stewardship and personal safety. Always pack out all trash and avoid disturbing wildlife or vegetation. Stay on designated trails to minimize erosion and protect fragile alpine ecosystems. Carry ample water‚ sunscreen‚ and layers‚ as weather conditions can change rapidly. Be prepared for high altitude by hydrating and acclimating gradually. Bring a map‚ compass‚ or GPS device‚ and inform someone of your itinerary; Respect private property and wildlife habitats. Safety tips include avoiding solo hiking when possible and being aware of potential hazards like steep drop-offs and inclement weather. These guidelines ensure a safe and sustainable experience for all trail users.
Community and Partnerships
Silverton’s trail system thrives through partnerships with organizations like Hardrock Hundred‚ USFS‚ BLM‚ and San Juan County‚ ensuring trail maintenance and community-driven conservation efforts.
5.1 Local Partnerships for Trail Maintenance
Silverton’s trails benefit from strong collaborations between local organizations and government agencies. Partners like the Hardrock Hundred‚ USFS‚ BLM‚ and San Juan County work together to maintain and improve trail systems. These partnerships ensure trails remain accessible for hikers and motorized vehicles. Local groups often organize clean-up events and trail-building projects‚ engaging the community in preserving Silverton’s natural beauty. Such efforts not only enhance trail conditions but also foster a sense of stewardship among residents and visitors. Regular updates and trail maps‚ often available in PDF formats‚ are shared through these partnerships‚ keeping adventurers informed. These collaborative efforts are vital for sustaining Silverton’s outdoor recreational opportunities.
5.2 Events and Workshops in Silverton
Silverton hosts various events and workshops that promote trail awareness and outdoor education. Local organizations‚ such as the Hardrock Hundred and USFS‚ organize trail-building workshops and conservation seminars. These events often feature hands-on activities‚ educational sessions‚ and guest speakers. Workshops cover topics like trail navigation‚ environmental conservation‚ and safety tips for hikers. Additionally‚ community events such as the annual Hardrock Hundred race bring together outdoor enthusiasts‚ fostering a sense of unity and shared responsibility for Silverton’s trails. These gatherings provide opportunities to learn about trail maintenance‚ download updated PDF trail maps‚ and connect with local experts. They are essential for preserving Silverton’s outdoor legacy.
Safety and Emergency Preparedness
Always ensure safety with a first aid kit‚ emergency contacts‚ and informing someone of your itinerary. Stay on marked trails and watch for changing weather conditions.
6.1 Emergency Contacts and Rescue Services
In case of emergencies‚ contact Silverton’s local authorities or dial 911. Carry a personal locator beacon (PLB) for remote areas with no cell service. Stay informed about weather conditions and trail closures to avoid risky situations. Always share your itinerary with someone trusted before heading out. The Silverton Police Department and San Juan County Search and Rescue are key resources for emergencies. Downloading the Silverton PDF trails guide provides essential contact information for local rescue services. Be prepared with a first aid kit and know basic wilderness survival skills. Remember‚ prevention is the best way to stay safe on the trails.
6.2 First Aid and Medical Facilities in Silverton
Silverton has basic medical facilities‚ but severe injuries may require evacuation to larger towns like Durango. Carry a first aid kit and know basic wilderness first aid. The Silverton PDF trails guide includes a section on emergency preparedness‚ highlighting local medical resources. Stay informed about trail conditions to prevent accidents. Always check the weather before hiking and avoid risky terrain. Familiarize yourself with common injuries like sprains or altitude sickness. Pack essentials like bandages‚ pain relievers‚ and blister care. Knowing basic first aid can save lives in remote areas. Plan ahead and stay safe on your Silverton trail adventure.
Future Developments and Trail Expansion
Silverton’s trail network is expanding with new routes and improvements‚ focusing on sustainability and user accessibility. Community partnerships and funding are driving these exciting developments.
7.1 Upcoming Projects for Trail Improvement
Silverton’s trail system is set to undergo significant enhancements‚ with plans to expand the Ice Lake Trail and upgrade access to Highland Mary Lakes. New routes near Red Mountain will offer breathtaking views‚ while bridge replacements and erosion control measures aim to improve safety and sustainability. Digital map integration into PDF guides will provide hikers with real-time updates and better navigation tools. These projects‚ funded by local partnerships and grants‚ are expected to boost tourism while preserving the natural beauty of the area. Community involvement is encouraged to ensure these developments align with both visitor needs and environmental protection goals.
7.2 Community Involvement in Trail Development
Community involvement is crucial for the sustainable growth of Silverton’s trail network. Local partnerships‚ including collaborations with organizations like the Hardrock Hundred and San Juan County‚ ensure trails align with both recreational and environmental goals. Residents actively participate in trail maintenance through volunteer programs‚ while public meetings gather feedback for new projects. Workshops on trail stewardship and conservation are regularly hosted to educate the community. This collective effort not only enhances the trails but also fosters a sense of ownership and responsibility among locals and visitors alike‚ ensuring Silverton’s outdoor spaces remain accessible and pristine for future generations.
Silverton’s trail network‚ supported by detailed PDF guides‚ offers unforgettable outdoor experiences. From the stunning Ice Lake Trail to the serene Highland Mary Lakes‚ these routes cater to all skill levels. The community’s active involvement in trail development ensures sustainable growth‚ while partnerships with local organizations maintain environmental balance. As Silverton continues to expand its trail system‚ hikers and adventurers are encouraged to explore these breathtaking landscapes responsibly. Downloading PDF maps and staying informed about trail conditions are essential steps for a safe and enjoyable journey. With its rich natural beauty and strong community support‚ Silverton remains a premier destination for outdoor enthusiasts.