Scoliosis exercises are non-invasive treatments that improve posture, reduce pain, and strengthen core muscles. Customized programs like Schroth and SEAS focus on specific curve patterns, promoting long-term spinal stability and proper alignment. Regular practice, combined with professional guidance, enhances overall well-being and prevents progression in mild to moderate cases.
Understanding Scoliosis
Scoliosis is a medical condition causing an abnormal lateral curvature of the spine. It can be idiopathic, congenital, or degenerative. Early diagnosis is crucial for effective management.
Types of Scoliosis
Scoliosis is categorized into several types based on its cause and characteristics. Idiopathic scoliosis is the most common and has no known cause, often appearing in adolescents; Congenital scoliosis is present at birth, typically due to spinal deformities. Degenerative scoliosis occurs in adulthood, often as a result of spinal wear and tear. Less common types include neuromuscular scoliosis, caused by muscle or nerve disorders, and traumatic scoliosis, resulting from spinal injuries. Each type requires tailored treatment approaches to address its unique challenges and progression risks.
Importance of Early Diagnosis
Early diagnosis of scoliosis significantly improves treatment outcomes by halting or slowing progression. Timely detection allows for non-invasive interventions like bracing and specific exercises, reducing the need for surgery. Regular screenings during adolescence can identify mild curves before they worsen. Early intervention enhances spinal stability and reduces long-term health risks. Delaying diagnosis may lead to severe deformities, impacting posture, breathing, and overall quality of life. Prompt medical evaluation ensures personalized treatment plans, optimizing comfort and function for individuals with scoliosis.

Role of Exercises in Scoliosis Management
Exercises play a crucial role in managing scoliosis by improving posture, reducing pain, and strengthening core muscles. They help stabilize the spine and prevent progression of the curve.
How Exercises Help
Exercises for scoliosis help improve posture, strengthen spinal muscles, and enhance spinal stability. They can prevent curvature progression in mild cases and reduce discomfort. Customized programs like Schroth focus on correcting posture and stabilizing the spine. Regular exercise improves flexibility, balance, and overall spinal alignment, promoting long-term well-being and reducing the need for invasive treatments. They also boost core strength, which is essential for maintaining proper spinal positioning and preventing further deformity. Consistent practice, tailored to individual needs, can lead to significant improvements in both appearance and function.
Types of Exercises
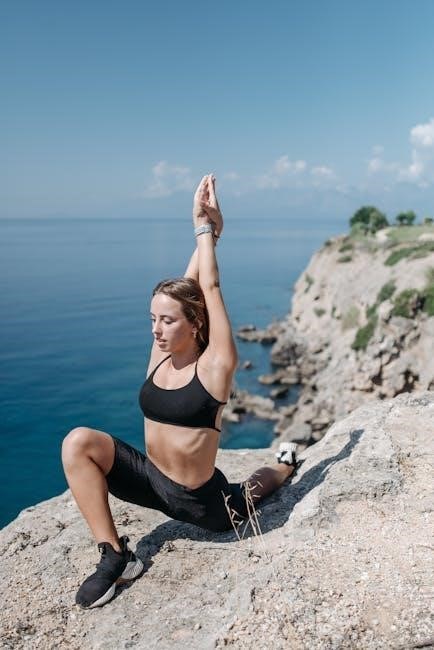
Scoliosis exercises include stretching, strengthening, flexibility, and posture correction routines. Stretching exercises improve spinal flexibility, while strengthening exercises target core and back muscles for better support. Flexibility exercises enhance range of motion, reducing stiffness. Posture correction exercises focus on aligning the spine properly. Additionally, specialized programs like Schroth and SEAS offer tailored approaches for different curve patterns. These exercises are often combined with breathing techniques to promote proper spinal alignment and stability. Each type of exercise serves a unique purpose, contributing to overall spinal health and reducing the risk of curvature progression when performed consistently.
Stretching Exercises
Stretching exercises are essential for improving spinal flexibility and reducing muscle tightness in scoliosis patients. These exercises target specific muscle groups along the spine, hips, and pelvis to enhance range of motion and alleviate discomfort. Common stretches include pelvic tilts, cat-camel stretches, and side stretches to address curvature. Regular stretching helps improve posture and reduces rigidity in the spine. Consistency is key, as these exercises are most effective when performed regularly. They are often combined with strengthening routines for a balanced approach to scoliosis management. Proper technique is crucial to avoid overstretching or causing strain.
Strengthening Exercises
Strengthening exercises for scoliosis focus on building muscle tone to support the spine and improve posture. These exercises target the core, back, and pelvic muscles, which are crucial for spinal stability. Planks, bird-dog exercises, and Superman stretches are common examples. Strengthening routines help counteract muscle imbalances caused by the curvature, promoting better alignment and reducing discomfort. Customized plans are often created by physiotherapists to address specific curve patterns. Regular practice enhances spinal stability and complements other forms of treatment, such as bracing or physical therapy. Consistency is vital to achieve long-term benefits and prevent progression.
Flexibility Exercises
Flexibility exercises are essential in scoliosis management, aiming to improve spinal mobility and reduce muscle tightness. Gentle stretches for the hamstrings, hip flexors, and chest muscles help maintain range of motion. Cat-cow stretches and child’s pose are commonly recommended to enhance flexibility without overextending the spine. These exercises are often performed in conjunction with strengthening routines to create a balanced approach. Proper form and controlled movements are emphasized to avoid aggravating the curvature. Regular flexibility practice can enhance posture and reduce stiffness, contributing to a more comfortable and active lifestyle for individuals with scoliosis.

Schroth Method for Scoliosis
The Schroth Method, developed by Katharina Schroth, is a conservative treatment focusing on specific exercises to correct spinal curvature. It emphasizes breathing techniques, posture correction, and core stabilization to improve spinal alignment and reduce scoliosis progression. This approach is tailored to individual curve patterns, aiming to enhance overall spinal stability and patient mobility.
What is the Schroth Method?
The Schroth Method is a non-invasive, exercise-based approach for scoliosis management. Developed by Katharina Schroth, it focuses on corrective breathing, posture correction, and core stabilization to address spinal curvature. This method emphasizes individualized exercises tailored to the patient’s specific curve pattern, aiming to halt progression and improve spinal alignment. By strengthening muscles and enhancing awareness, the Schroth Method promotes long-term spinal stability and overall well-being. It is particularly effective for patients with moderate scoliosis and is often recommended as part of a conservative treatment plan.
Key Schroth Exercises
The Schroth Method incorporates specific exercises tailored to the individual’s curve pattern. Key exercises include corrective breathing techniques to improve spinal alignment and posture correction to reduce curvature. Pelvic tilts and spinal rotations help strengthen the core and improve flexibility. Side-shifts and auto-corrections are used to counteract the lateral curvature of the spine. These exercises, performed under professional guidance, aim to stabilize the spine, enhance muscle strength, and improve overall posture. Regular practice is essential for achieving long-term benefits and preventing progression of the condition.
Lyon Method for Scoliosis Treatment
The Lyon Method offers age-specific protocols, avoiding stretching for juvenile patients to address scoliosis effectively.
Overview of the Lyon Method
The Lyon Method is a personalized approach to scoliosis treatment, emphasizing age-specific exercises tailored to the patient’s curvature and growth stage. It avoids stretching in younger patients, focusing instead on strengthening and posture correction. This method is designed to improve spinal alignment and reduce progression, particularly during growth spurts. Professional guidance ensures safety and effectiveness, making it a valuable option for conservative management of scoliosis.
Age-Specific Treatment Protocols
The Lyon Method tailors exercises to the patient’s age, particularly focusing on juveniles (under 15-17 years), who avoid stretching to prevent curve progression. Adolescents receive balanced programs combining strengthening and posture correction, while adults focus on pain management and mobility. These age-specific protocols aim to address unique spinal needs during growth and adulthood, ensuring effective conservative scoliosis management.
Exercises for Milwaukee Brace Users
Patients wearing a Milwaukee Brace perform 14 specific exercises targeting the back, core, and pelvis to maintain mobility and strength while braced. These exercises are essential for effective treatment.
Exercise List for Milwaukee Brace
The Milwaukee Brace exercise list includes 14 specific exercises designed to improve mobility and strength while wearing the brace. These exercises target the back, core, and pelvis, focusing on maintaining flexibility and muscle tone. Examples include pelvic tilts and cat-camel stretches, which help counteract the restrictive nature of the brace. Regular performance of these exercises is crucial to prevent muscle atrophy and ensure proper spinal alignment; The exercises are tailored to be performed with the brace on, promoting long-term spinal health and stability during treatment. Consistency is key to achieving optimal results.

Core Strengthening Exercises
Core strengthening exercises are essential for stabilizing the spine and improving posture in scoliosis patients. Planks, bird-dog, and bridges are effective for building spinal stability and muscle balance, reducing curvature progression and enhancing overall spinal alignment. Regular practice under professional guidance ensures proper form and maximum benefits.
Importance of Core Strengthening
Core strengthening is vital for improving spinal stability and posture in scoliosis patients. Strong core muscles act as a natural brace, reducing curvature progression and enhancing spinal alignment. By targeting abdominal and back muscles, these exercises improve balance, reduce pain, and promote better movement patterns. Regular core work also enhances proprioception, helping patients maintain proper posture. Combined with professional guidance, core exercises are a cornerstone of scoliosis management, offering long-term benefits for spinal health and overall well-being.
Specific Core Exercises
- Plank Variations: Enhance spinal stability by holding steady positions, engaging abdominal muscles.
- Bird Dog: Improves balance and targets core muscles by extending opposite arms and legs.
- Pelvic Tilts: Strengthen lower back and pelvic muscles, promoting proper spinal alignment.
- Superman: Strengthens back muscles, countering forward spinal curvature;
- Side Plank: Targets obliques, crucial for correcting lateral spinal imbalances.
These exercises, when performed with proper form and consistency, significantly improve core strength and spinal stability in scoliosis patients.
Posture Correction Exercises
Posture correction exercises focus on improving spinal alignment through targeted movements. Techniques like pelvic tilts, shoulder rolls, and planks help restore natural posture, reducing scoliosis-related discomfort.
Techniques for Better Posture
Techniques for better posture often include pelvic tilts, shoulder rolls, and planks to strengthen core muscles. Cat-cow stretches improve spinal flexibility, while mindful breathing enhances body awareness. The Lyon method emphasizes age-specific exercises, focusing on juvenile patients avoiding stretching. SEAS programs, designed by certified physiotherapists, offer tailored routines for scoliosis treatment. These exercises, when performed consistently, can improve spinal alignment and reduce discomfort. Proper guidance ensures exercises are done safely and effectively, promoting better posture and long-term spinal stability.

Warm-Up Routine
A 5-10 minute warm-up with low-impact activities like walking or cycling prepares muscles and spine for exercises, improving flexibility and reducing injury risk.
Pre-Exercise Warm-Up
A proper warm-up before scoliosis exercises is essential to prepare the muscles and spine. Start with 5-10 minutes of low-impact activities like walking or cycling to improve circulation and flexibility. Gentle dynamic stretches, such as arm circles or leg swings, can help loosen tight muscles. Deep breathing exercises also enhance relaxation and focus. Avoid overexertion during the warm-up, as the goal is to gradually increase movement and prepare the body for targeted exercises. This routine ensures a safe transition into more intense activities, reducing the risk of injury and improving overall exercise effectiveness.
Monitoring Progress
Regular check-ups and X-rays help track spinal alignment improvements. Posture and strength assessments ensure exercises are effective. Adjustments are made based on progress to achieve optimal results.
How to Track Progress
Tracking progress involves regular check-ups, X-rays, and posture assessments. Patients should monitor strength, flexibility, and pain levels. Keeping a journal of exercise consistency and improvements helps identify patterns. Professionals may use specific metrics to evaluate spinal alignment and muscle development. Adjustments to the exercise program are made based on progress to ensure optimal results. Consistent practice and adherence to the program are key to achieving long-term benefits. Regular feedback from physiotherapists or healthcare providers ensures the exercises remain effective and tailored to the individual’s needs.
Common Mistakes to Avoid
Avoid overstretching, improper posture, and unsupervised exercise routines. Neglecting professional guidance and ignoring individual curve patterns can worsen scoliosis. Ensure exercises are tailored and performed correctly.
What Not to Do
- Avoid generic exercise routines not tailored to your specific scoliosis curve pattern.
- Do not overstretch or force spinal movements beyond comfortable limits.
- Neglecting professional guidance can lead to improper techniques and potential harm.
- Never ignore pain; discontinue any exercise causing discomfort.
- Refrain from heavy lifting or high-impact activities without medical approval.
- Do not skip warm-ups or cooldowns, as they prevent muscle strain.
- Avoid exercising without proper posture alignment, as it may worsen the curvature.
Avoiding these common pitfalls ensures safer and more effective scoliosis exercise practices.
Scoliosis exercises offer a powerful, non-invasive approach to managing spinal curvature and improving overall posture. Tailored programs like the Schroth and Lyon methods have proven effective in stabilizing curves and enhancing quality of life. Consistency and professional guidance are key to achieving optimal results. By avoiding common mistakes and adhering to personalized routines, individuals can reduce pain, strengthen core muscles, and maintain long-term spinal health. Embracing these exercises empowers patients to take an active role in their treatment, fostering confidence and physical well-being.