
Race car vehicle dynamics is a critical field studying how tire forces‚ aerodynamics‚ and weight distribution influence a car’s motion and stability. It’s vital for optimizing performance in racing‚ as discussed in resources like Milliken’s book and applied in Formula SAE projects‚ impacting design and engineering.
Foundations of Vehicle Dynamics
Race car vehicle dynamics begins with understanding the fundamental physics and engineering principles that govern motion. Tire forces‚ aerodynamics‚ and weight distribution are crucial‚ influencing stability and performance through Newton’s laws of motion.
Physics and Engineering Principles
The core of race car vehicle dynamics lies in understanding the physics and engineering principles that dictate how forces interact with the car. Newton’s laws of motion form the foundation‚ explaining how acceleration‚ braking‚ and cornering forces influence the vehicle. Tire dynamics play a crucial role‚ as they translate driver inputs into tangible forces. The relationship between tire slip angles and lateral force generation is fundamental‚ as described in resources like Milliken’s Race Car Vehicle Dynamics. Aerodynamic forces‚ including downforce and drag‚ further shape the car’s behavior. Engineering principles such as weight distribution and center of gravity are critical for maintaining stability and optimizing performance. These principles are applied in real-world scenarios‚ from Formula SAE projects to professional racing‚ to enhance speed and control.
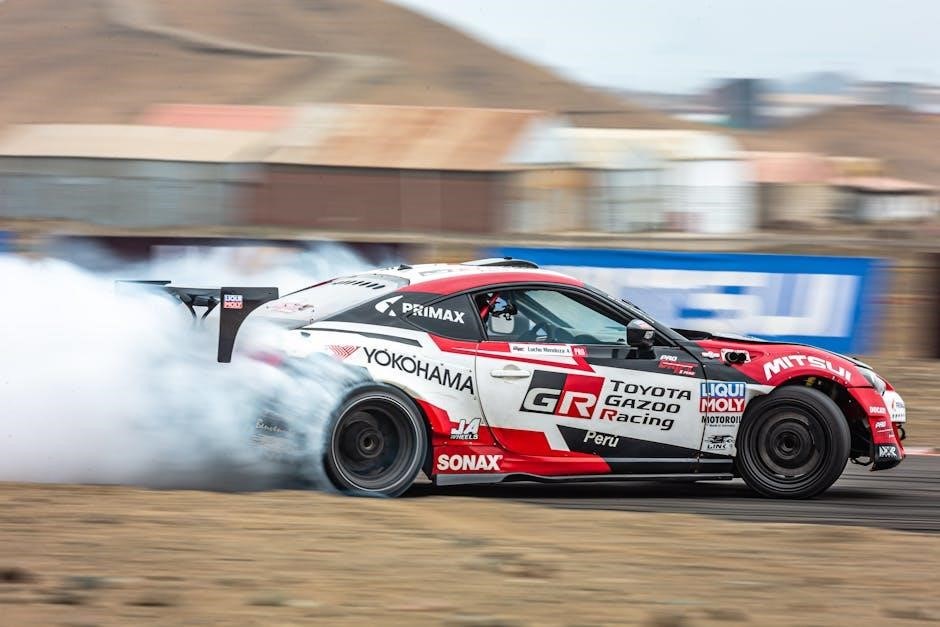
Tire Dynamics and Forces
Tires are the primary interface between the race car and the track‚ making their dynamics crucial for performance. The interaction between tire slip angles and lateral forces is key‚ as described in Milliken’s work. Tire forces include longitudinal (acceleration and braking) and lateral (cornering) components‚ which must be balanced for optimal grip. The tire’s slip ratio and camber angle significantly affect traction‚ influencing handling characteristics. Load transfer and tire deflection also play roles in determining how forces are distributed. Understanding these dynamics helps engineers optimize tire performance‚ enhancing acceleration‚ braking‚ and cornering capabilities. This knowledge is applied in racing to maximize adherence to the track‚ ensuring efficient power delivery and stability.
Aerodynamic Forces
Aerodynamic forces in race cars are crucial for performance‚ primarily generating downforce to enhance grip and reduce drag for speed. Components like wings and diffusers create pressure differences‚ maximizing downforce while minimizing drag. Airflow management around tires optimizes efficiency. Engineers analyze these forces to improve stability and traction‚ ensuring optimal aerodynamic balance for various track conditions. This understanding‚ as discussed in Milliken’s work‚ is key to enhancing race car performance through strategic aerodynamic design and adjustments. Proper management of these forces leads to faster lap times and better handling‚ making aerodynamics a cornerstone of race car engineering and performance optimization.
Weight Distribution and Center of Gravity
Weight distribution and center of gravity are essential for race car stability and handling. Proper balance ensures optimal tire loading‚ improving traction and cornering capabilities. A lower center of gravity enhances stability by reducing rollover risk‚ while strategic weight distribution tailors handling characteristics. Engineers adjust these factors through component placement and chassis design‚ as detailed in Milliken’s insights‚ to achieve competitive performance. Effective management of weight distribution directly impacts acceleration‚ braking‚ and cornering efficiency‚ making it a fundamental aspect of race car dynamics and a critical focus in optimizing vehicle performance for various racing conditions and requirements. This balance ensures drivers can push cars to their limits confidently.
Key Components of Race Car Dynamics
Race car dynamics involve suspension‚ chassis‚ differential‚ and braking systems‚ each crucial for performance. These components optimize handling‚ stability‚ and speed‚ as detailed in Milliken’s work.
Suspension Systems
Suspension systems are critical for maintaining tire contact and controlling vehicle dynamics. They balance ride comfort with performance‚ optimizing handling and stability. Race car suspensions are finely tuned to manage camber‚ toe‚ and spring rates‚ ensuring optimal aerodynamic efficiency. Adjustments like anti-roll bars and dampers further refine weight transfer and traction; Advanced systems use data from track conditions to adapt setups‚ enhancing grip and reducing lap times. Proper suspension geometry is essential for consistent performance‚ as detailed in Milliken’s work on vehicle dynamics.
Chassis Design
Chassis design is the foundation of race car performance‚ providing structural integrity and optimizing weight distribution. A lightweight yet rigid chassis enhances handling and stability‚ crucial for competitive racing. Materials like carbon fiber are favored for their strength-to-weight ratio. The chassis must absorb and distribute forces from acceleration‚ braking‚ and cornering‚ ensuring consistent tire contact. Proper design also accommodates aerodynamic components‚ improving downforce without compromising structural integrity. As discussed in Milliken’s work‚ an optimized chassis layout directly impacts vehicle dynamics‚ making it a key focus in race car engineering and Formula SAE projects.
Differential and Drivetrain
The differential and drivetrain are essential for transferring power efficiently from the engine to the wheels. A limited-slip differential (LSD) enhances traction by balancing wheel speeds during cornering‚ reducing understeer or oversteer. Modern drivetrains are optimized for minimal weight and maximum durability‚ with gear ratios tailored for specific race conditions. Advances in drivetrain technology‚ such as semi-automatic transmissions‚ improve shifting speed and driver control. Proper drivetrain setup ensures optimal power delivery‚ crucial for acceleration and maintaining competitive performance. As highlighted in Milliken’s work‚ the drivetrain’s role in vehicle dynamics is pivotal‚ impacting both stability and speed in racing applications.
Braking Systems
Braking systems are crucial for race car performance‚ balancing speed reduction with stability. Advanced materials like carbon-carbon brakes offer superior heat resistance and stopping power. Brake bias adjustment optimizes front-to-rear torque distribution‚ enhancing control during deceleration. Efficient cooling systems prevent overheating‚ ensuring consistent braking performance. As highlighted in vehicle dynamics resources‚ effective braking directly impacts lap times and safety. Modern systems integrate with aerodynamics and tire management to maintain stability under heavy braking. The design and tuning of braking systems are vital for competitive racing‚ requiring precise engineering to maximize performance and reliability. Proper braking setup ensures drivers can maintain control while pushing the car to its limits‚ making it a cornerstone of race car dynamics.
Engine Dynamics
Engine dynamics play a pivotal role in race car performance‚ focusing on power delivery‚ efficiency‚ and responsiveness. Modern engines are optimized for high-revving capabilities‚ ensuring maximum power output and torque. Advanced technologies like turbocharging and direct fuel injection enhance performance while maintaining fuel efficiency. As discussed in vehicle dynamics resources‚ engine characteristics directly influence acceleration and handling. The integration of engine management systems with drivetrain components ensures optimal power transfer to the wheels. Engine placement and weight distribution are also critical‚ affecting the car’s center of gravity and stability. Efficient cooling systems and materials are used to manage thermal stress‚ ensuring reliability under extreme racing conditions. Proper engine tuning and maintenance are essential for maintaining peak performance and competitiveness on the track.
Performance Optimization
Performance optimization in race cars involves enhancing speed‚ stability‚ and control through aerodynamic improvements‚ weight distribution‚ and engine efficiency. Advanced tools like simulation software and data acquisition systems aid in achieving peak performance.
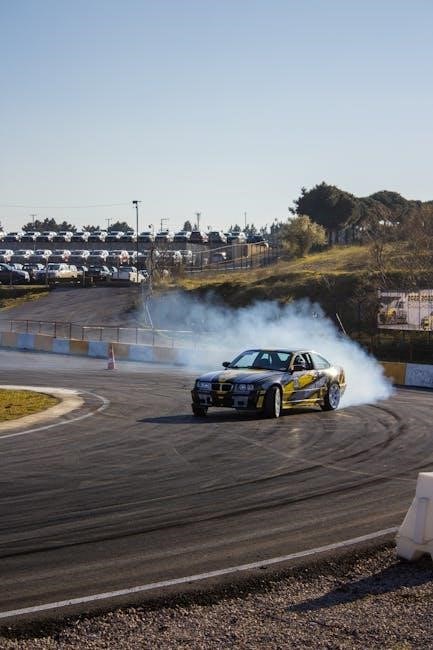
Handling and Stability
Handling and stability are crucial for race car performance‚ ensuring predictable behavior during cornering and braking. Tire dynamics play a significant role‚ with understeer and oversteer phenomena needing careful balance. Suspension systems and aerodynamic forces also contribute to maintaining stability at high speeds. Weight distribution and center of gravity are key factors‚ as they influence how forces are distributed across the vehicle. Advanced engineering principles and simulation tools help optimize these aspects‚ ensuring the car remains responsive and stable under various racing conditions. Proper setup and adjustments are essential to adapt to different tracks and driving styles‚ enhancing overall competitiveness.
Acceleration and Power Delivery
Acceleration and power delivery are fundamental to race car performance‚ focusing on how energy is transferred from the engine to the wheels. Engine dynamics‚ drivetrain efficiency‚ and torque distribution are critical factors. Proper power delivery ensures optimal traction‚ minimizing wheelspin and maximizing speed. Tire dynamics play a role in maintaining grip during acceleration‚ while weight distribution influences how power is applied to the ground. Advanced drivetrain systems‚ such as limited-slip differentials‚ enhance torque delivery between wheels. Efficient power transfer is essential for competitive racing‚ with engineers continually optimizing engine and drivetrain components. Simulation tools and real-world testing help refine these systems‚ ensuring peak performance on the track.
Braking Performance
Braking performance is a cornerstone of race car dynamics‚ directly impacting lap times and safety. Effective braking systems ensure consistent and predictable deceleration‚ enabling drivers to maintain control during high-speed maneuvers. Key factors include brake component durability‚ heat dissipation‚ and aerodynamic downforce‚ which enhances stopping power. Advanced materials like carbon-carbon brakes are used in professional racing for superior heat resistance. Brake balance‚ achieved through electronic systems‚ optimizes front-to-rear brake bias‚ reducing stopping distances and minimizing wheel lockup. Tire dynamics play a crucial role in translating braking forces into deceleration‚ while weight distribution influences braking stability. Modern race cars employ sophisticated ABS systems to maximize braking efficiency without compromising traction. Efficient braking is as critical as acceleration in achieving overall performance.
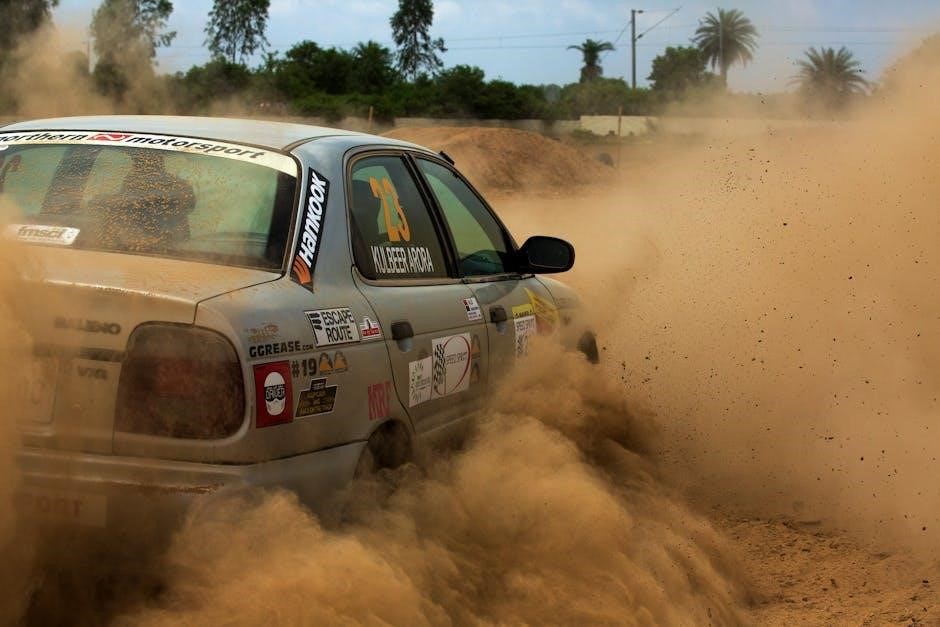
Tire Management and Wear
Tire management is essential for race car performance‚ as tires are the sole interface between the vehicle and the track. Proper tire management ensures consistent grip‚ handling‚ and durability. Race teams meticulously monitor tire wear patterns‚ pressures‚ and temperatures to optimize performance. Uneven wear can lead to reduced traction and increased risk of failure. Tire compounds are selected based on track conditions‚ with softer compounds providing more grip but wearing faster. Advanced sensors and data acquisition systems track real-time tire data‚ enabling precise adjustments. Managing tire wear strategically extends their lifespan and maintains consistent performance throughout a race. Effective tire management is a critical factor in achieving competitive advantage and ensuring safety.
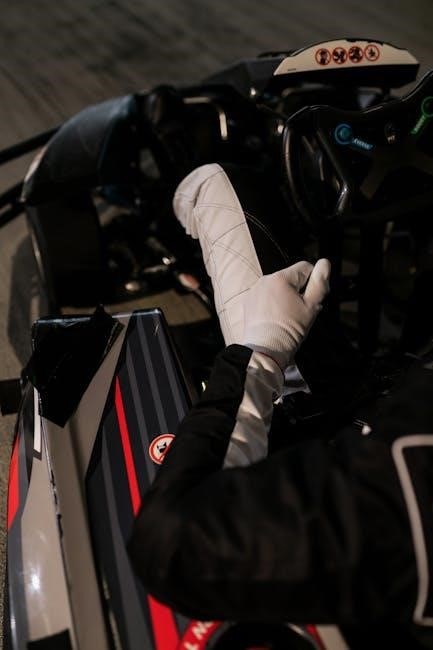
Driver Interaction and Feedback
Driver interaction is pivotal in race car dynamics‚ as feedback from the vehicle directly influences performance. A responsive steering system‚ precise throttle control‚ and intuitive braking systems are essential for drivers to maintain control. Effective communication between the driver and the car ensures quick adjustments during races. Real-time data from sensors and monitoring tools provides drivers with critical information‚ enabling them to optimize their driving techniques. The balance between vehicle dynamics and driver input is vital for achieving peak performance. Feedback mechanisms‚ such as steering feel and chassis response‚ allow drivers to anticipate and react to handling changes. This synergy between driver and machine is central to competitive racing‚ where milliseconds can determine outcomes. Enhanced feedback systems improve lap times and overall race results.

Tools and Technology
Advanced simulation software‚ data acquisition systems‚ and sensors are essential for analyzing race car dynamics‚ enabling precise tuning and performance optimization through real-time monitoring and modeling.
Simulation Software
Simulation software plays a pivotal role in race car vehicle dynamics by enabling the creation of detailed models to analyze and predict vehicle behavior. Tools like SIMPACK allow engineers to simulate various racing scenarios‚ optimizing factors such as tire forces‚ aerodynamic drag‚ and weight distribution. These simulations provide insights into handling‚ stability‚ and performance under different conditions. By integrating real-time data‚ engineers can test virtual prototypes‚ reducing the need for physical prototypes and accelerating development. Simulation software also aids in fine-tuning components like suspension and drivetrain‚ ensuring optimal performance on the track. This technology is widely used in Formula SAE projects and professional racing to enhance vehicle dynamics and gain a competitive edge.
Data Acquisition Systems
Data acquisition systems are essential for capturing and analyzing real-time data in race car vehicle dynamics. These systems collect information on parameters such as speed‚ acceleration‚ tire forces‚ and temperatures‚ providing valuable insights into vehicle performance. The data is used to fine-tune components like suspension‚ aerodynamics‚ and engine dynamics‚ ensuring optimal setup for different racing conditions. Advanced sensors monitor critical aspects of the car‚ enabling engineers to identify areas for improvement. This technology is widely employed in professional racing and projects like Formula SAE‚ where precise data analysis is crucial for achieving competitive advantage. By leveraging data acquisition‚ teams can make informed decisions‚ enhance reliability‚ and improve overall race car dynamics.
Sensors and Monitoring Tools
Sensors and monitoring tools play a pivotal role in race car vehicle dynamics by providing real-time data on various aspects of car performance. Accelerometers‚ gyroscopes‚ and pressure sensors are used to measure acceleration‚ yaw rate‚ and tire forces‚ offering insights into handling and stability. Temperature sensors monitor critical components like brakes and engines‚ ensuring optimal operating conditions. These tools are integrated with data acquisition systems to collect and analyze information‚ enabling engineers to identify trends and potential issues. Advanced monitoring tools also provide feedback to drivers‚ enhancing their interaction with the car. The accuracy and reliability of these sensors are crucial for making precise adjustments and improving overall vehicle dynamics‚ as highlighted in resources like the “Race Car Vehicle Dynamics” PDF. This data-driven approach is essential for achieving peak performance in racing environments.
Case Studies and Practical Applications
Case studies highlight real-world applications of race car dynamics‚ such as Formula SAE projects and solar racing‚ demonstrating practical implementations of theoretical principles in competitive environments.
Formula SAE Projects
Formula SAE projects provide hands-on learning experiences for students‚ focusing on designing and building high-performance race cars. These initiatives emphasize understanding vehicle dynamics‚ aerodynamics‚ and mechanical systems. Teams use tools like SIMPACK to model and simulate car behavior‚ optimizing handling and stability. For instance‚ Texas A&M University’s Formula SAE program lacks a rigorous method for analyzing dynamic behavior‚ highlighting the need for advanced modeling techniques. Aston University’s dedication to the project showcases how academic programs drive innovation in race car design. These projects bridge theoretical concepts with practical applications‚ fostering engineering excellence and preparing students for professional racing environments. They demonstrate how vehicle dynamics principles are applied to real-world challenges in motorsport.
Professional Racing Insights
Professional racing teams leverage advanced vehicle dynamics to optimize performance‚ handling‚ and stability. Adjustments in car balance and aerodynamics‚ known as trim changes‚ are crucial for adapting to track conditions. Tire rotation and management are vital for maintaining grip and reducing wear. Tools like SIMPACK enable precise modeling of vehicle behavior‚ enhancing predictability. Insights from experts like William F. Milliken provide foundational knowledge for engineers. These practices ensure vehicles operate at peak efficiency‚ balancing speed and control. Professional racing insights highlight the intersection of theoretical principles and practical execution‚ driving continuous innovation in automotive engineering. These advancements influence both competitive racing and the broader automotive industry‚ showcasing the importance of vehicle dynamics in high-performance applications.
Solar Racing Applications
Solar racing applications represent a unique intersection of sustainability and performance‚ where vehicle dynamics play a crucial role. Teams designing solar-powered race cars must optimize efficiency‚ weight distribution‚ and aerodynamics to maximize energy utilization. The use of lightweight materials and advanced aerodynamic designs minimizes drag‚ enhancing speed and range. Tire management is critical due to the low weight and specific handling characteristics of solar vehicles. Tools like SIMPACK are employed to model and predict vehicle behavior‚ ensuring optimal performance under varying conditions. These applications highlight the importance of balancing energy efficiency with dynamic stability‚ pushing the boundaries of sustainable automotive engineering. Solar racing exemplifies how vehicle dynamics principles can be adapted to innovative‚ eco-focused designs‚ driving progress in both racing and broader automotive industries.
Safety Considerations
Impact protection and emergency systems are crucial in race car design to safeguard drivers during collisions or malfunctions‚ ensuring survival and minimizing injury risks in high-speed environments.
Impact Protection
Impact protection in race cars is essential for driver safety‚ focusing on absorbing and distributing crash forces. Key components include roll cages‚ which provide structural integrity‚ and monocoques‚ like carbon fiber chassis‚ designed to crumple and absorb energy. Energy-absorbing materials are strategically placed to reduce deceleration forces on the driver. Helmets‚ HANS devices‚ and seatbelts further enhance protection. These systems are rigorously tested to meet safety standards‚ ensuring survival in high-speed impacts. Advances in materials and engineering have significantly improved crash survivability‚ making modern race cars safer while maintaining performance. Compliance with regulations is critical‚ as seen in Formula SAE and professional racing‚ where safety is paramount. The integration of these technologies ensures drivers are safeguarded without compromising vehicle dynamics.
Emergency Systems
Emergency systems in race cars are designed to prevent accidents and ensure driver safety. These include fire suppression systems‚ which rapidly extinguish flames‚ and emergency shutdowns to halt engine and electrical functions. Impact protection features like roll cages and energy-absorbing materials are also critical. Some cars have driver extraction systems‚ aiding quick removal in emergencies. These technologies are refined through rigorous testing and adhere to strict safety regulations. Advances in materials and engineering have enhanced reliability‚ ensuring systems activate effectively during crises. Proper maintenance and driver training further maximize their efficiency‚ making them indispensable in modern racing. These systems are essential for mitigating risks and protecting lives at high speeds.
Regulatory Compliance
Regulatory compliance ensures race cars meet safety and performance standards. Governing bodies like Formula SAE enforce strict rules on weight distribution‚ aerodynamics‚ and safety features to maintain fair competition and driver protection.
Racing Standards
Racing standards are established by governing bodies to ensure fair competition and safety. These standards dictate vehicle specifications‚ such as weight distribution‚ engine power‚ and aerodynamic limits. Compliance is verified through rigorous inspections and data analysis‚ as detailed in resources like the Formula SAE Rulebook. Adhering to these standards ensures that all teams operate on a level playing field‚ promoting innovation within defined boundaries. For instance‚ the 2015 Formula SAE Rules emphasize the importance of vehicle dynamics modeling using tools like SIMPACK to optimize performance while maintaining compliance. These standards are continuously updated to reflect advancements in technology and safety requirements.
Safety Regulations
Safety regulations in motorsport are designed to protect drivers‚ crews‚ and spectators from potential hazards. These regulations cover impact protection‚ emergency systems‚ and fire prevention measures. For example‚ cars must be equipped with roll cages‚ helmets‚ and fire-resistant materials. According to resources like Milliken’s Race Car Vehicle Dynamics‚ these measures are crucial for minimizing risks during high-speed racing. Additionally‚ vehicles are subjected to crash tests to ensure compliance with safety standards. Proper implementation of these regulations not only enhances safety but also contributes to the overall performance and reliability of race cars‚ ensuring a safer environment for all participants.
Race car vehicle dynamics continues to evolve‚ driven by advancements in technology and engineering. The integration of simulation software‚ data acquisition systems‚ and sensors has revolutionized how teams optimize performance. Future developments may focus on sustainable energy sources‚ such as solar racing‚ and enhanced driver feedback systems. As explored in resources like Milliken’s Race Car Vehicle Dynamics‚ these innovations will shape the next generation of racing‚ blending efficiency with speed. The field remains a cornerstone of motorsport‚ pushing boundaries and inspiring new approaches to vehicle design and operation.
References and Further Reading
For a deeper understanding‚ key resources include William F. Milliken’s Race Car Vehicle Dynamics‚ a foundational text in the field. Additional materials like Tune to Win ⎼ Race Car Tuning.pdf offer practical insights. Research papers discussing vehicle dynamics models‚ such as those using SIMPACK software‚ provide technical details. The Formula SAE rules and case studies from universities like Aston further enrich the topic. Online platforms‚ including Scribd and Open Library‚ host numerous PDF resources. These references collectively cover theoretical concepts‚ engineering applications‚ and real-world implementations‚ making them invaluable for both students and professionals in race car dynamics.