Psilocybin mushrooms‚ known for their psychoactive compounds‚ have fascinated humanity for centuries. This guide provides a comprehensive overview of their history‚ identification‚ and significance in culture and science.
1.1 Definition and Taxonomy
Psilocybin mushrooms are fungi containing psychoactive compounds like psilocybin and psilocin‚ belonging to the family Hymenogastraceae. They are classified under the genus Psilocybe‚ with species such as P. cubensis and P. semilanceata. These mushrooms are saprotrophic‚ thriving on decaying organic matter. While often referred to as “magic mushrooms‚” they are distinct from other fungi due to their hallucinogenic properties. Taxonomy emphasizes their unique chemical composition and ecological roles‚ separating them from non-psychoactive species. This classification aids in identification and understanding their biological significance.
1.2 Historical and Cultural Significance
Psilocybin mushrooms have deep roots in ancient cultures‚ particularly in Mesoamerica‚ where they were revered as sacred entities. The Aztecs and Mayans used them in religious rituals‚ calling them “teonanácatl‚” or “flesh of the gods.” Their psychoactive properties were believed to connect users with the divine. In the 20th century‚ Western culture rediscovered these fungi‚ sparking scientific and countercultural interest. Today‚ they hold significance in both spiritual practices and modern therapeutic research‚ symbolizing a bridge between tradition and innovation in human exploration of consciousness and well-being.
Physical Identification Features
Psilocybin mushrooms exhibit distinct physical features‚ including cap size‚ shape‚ and color‚ stem length and thickness‚ gill arrangement‚ spore color‚ and characteristic bruising reactions.
2.1 Cap Characteristics (Size‚ Shape‚ Color)
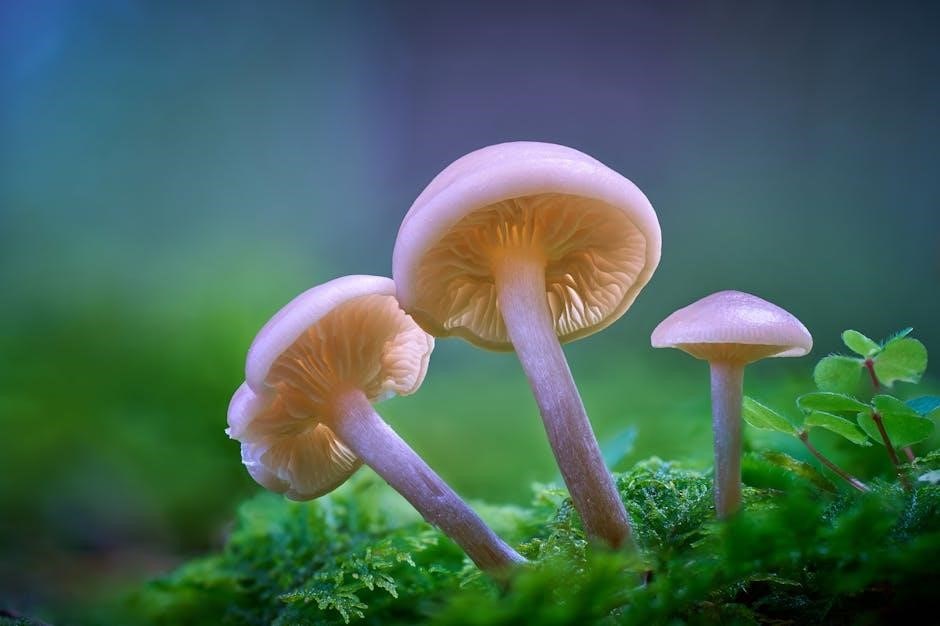
Psilocybin mushroom caps vary in size‚ shape‚ and color across species. For instance‚ Psilocybe semilanceata has a bell-shaped cap‚ 0.5–2 cm in diameter‚ with a cream to brown hue and visible striations. Psilocybe cubensis often features a rounded cap‚ typically 1–8 cm‚ ranging from light brown to golden. Some species‚ like Psilocybe azurescens‚ exhibit a caramel or golden-brown cap that darkens with age. The cap shape may flatten as the mushroom matures‚ and many species display a slight umbo or bump at the center. Colors often darken when dried‚ aiding in identification.
2.2 Stem Features (Length‚ Thickness‚ Color)
The stems of psilocybin mushrooms are typically slender and range in length from 1 to 10 cm‚ depending on the species. They are usually white or light-colored‚ often matching the cap’s hue. Some species‚ like Psilocybe cubensis‚ have stems that are slightly thicker and more robust‚ while others‚ such as Psilocybe semilanceata‚ are thinner and more delicate. The stem may be hollow or stuffed with a cotton-like material. When bruised‚ many species exhibit a blue or bluish tint‚ a key identification feature. The color and thickness often vary with age and environmental conditions‚ aiding in precise species identification.
2.3 Gills and Spores
The gills of psilocybin mushrooms are typically narrow and crowded‚ ranging in color from light brown to dark purplish-brown. As the mushroom matures‚ the gills may darken due to the maturation of spores. Spores are a critical feature for identification‚ often appearing dark purple to black when viewed against a white background. To obtain a spore print‚ place the cap gill-side down on a glass slide or white paper and cover it with a glass bowl for a few hours. This method helps in accurately identifying species based on spore color and size. Additionally‚ some species may exhibit a partial veil that leaves a ring on the stem‚ further aiding identification.
2.4 Bruising Reactions
Bruising reactions in psilocybin mushrooms are a key identification feature. When the flesh is injured‚ it often turns blue or bluish‚ especially in species like Psilocybe cubensis and Psilocybe semilanceata. This reaction is due to the oxidation of psilocybin. The blue coloration typically appears on the cap‚ gills‚ or stem. Bruising is more pronounced in fresh mushrooms and fades as they age. This characteristic is essential for distinguishing psilocybin mushrooms from similar-looking species that lack such reactions.

Habitat and Distribution
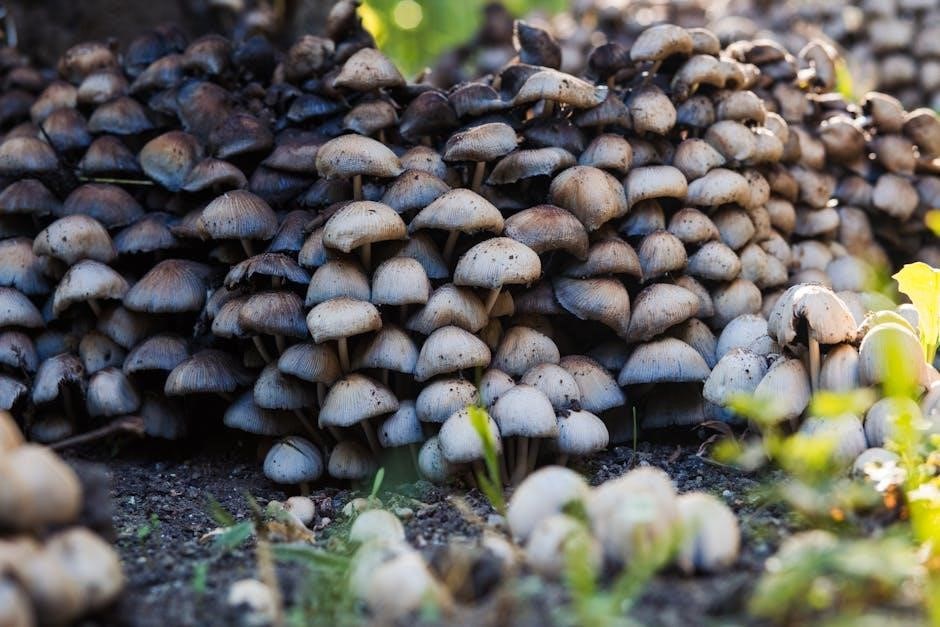
Psilocybin mushrooms thrive in diverse habitats‚ including grassy areas‚ forests‚ and dung-rich environments. Species like Psilocybe cubensis and Psilocybe semilanceata are found in tropical and temperate regions globally.
3.1 Geographical Distribution
Psilocybin mushrooms are found in diverse regions worldwide‚ including the Americas‚ Europe‚ Asia‚ Africa‚ and Australasia. Species like Psilocybe cubensis thrive in tropical climates‚ while Psilocybe semilanceata is common in Europe and North America. These fungi often grow in grassy fields‚ forests‚ and areas rich in organic matter. Tropical regions‚ such as Mexico and parts of South America‚ are known for their rich diversity of psilocybin-containing species. In the United States‚ they are frequently found in states like Florida‚ California‚ and Oregon. Australia and New Zealand also host native species‚ making these mushrooms a global phenomenon with varying regional distributions.
3.2 Natural Habitats and Growing Conditions
Psilocybin mushrooms thrive in diverse natural habitats‚ including grassy fields‚ forests‚ and areas rich in organic matter. Species like Psilocybe cubensis prefer tropical climates with warm temperatures and high humidity‚ often growing in dung or decaying plant material. Psilocybe semilanceata is commonly found in grazed fields and meadows in Europe and North America. These fungi typically require specific substrates‚ such as soil enriched with manure or wood debris‚ to fruit. They also rely on consistent moisture and moderate temperatures for optimal growth. Understanding their ecological preferences is crucial for successful identification and cultivation‚ as well as for preserving their natural habitats.
Legal Considerations
Psilocybin mushrooms are illegal in many countries‚ classified as controlled substances. Laws vary globally‚ with strict regulations on possession‚ cultivation‚ and distribution. Legal status and penalties differ by region‚ and importation often requires special permits. Always consult local laws to ensure compliance and avoid legal consequences. Recent changes in some areas allow medical use under specific conditions‚ but recreational use remains widely prohibited. Proper legal advice is essential for anyone engaging with these substances.
4.1 Global Legal Status
Psilocybin mushrooms are illegal in most countries‚ classified as controlled substances under international drug laws. In many nations‚ possession‚ cultivation‚ and distribution carry severe penalties. However‚ some regions‚ such as parts of Europe and the Americas‚ have decriminalized personal use or possession in small quantities. Medical and therapeutic use is gaining legal acceptance in certain jurisdictions‚ though restrictions remain tight. Importation typically requires special permits‚ and recreational use is widely prohibited. Legal status varies significantly by country‚ making it essential to understand local laws before engaging with these substances in any capacity.
4.2 Regulations on Cultivation and Possession
Regulations on cultivating and possessing psilocybin mushrooms vary globally but are often strict. In many countries‚ cultivation is illegal without a special license‚ and possession is criminalized. Licensed dealers must have psilocybin explicitly listed on their permits and obtain import permits from health authorities. Retail sale is prohibited in most regions‚ including Oregon‚ regardless of identification efforts. Penalties for illegal cultivation or possession can be severe‚ including fines and imprisonment. Legal exceptions exist in some areas for medical or therapeutic use‚ but these are rare and heavily regulated. Understanding local laws is crucial to avoid legal consequences.
Psilocybin Mushroom Species Overview
Psilocybin mushrooms encompass diverse species like Psilocybe cubensis‚ semilanceata‚ cyanescens‚ azurescens‚ and tampanensis. Each species exhibits unique cap characteristics‚ stem features‚ and habitat preferences‚ essential for accurate identification and study.
5.1 Psilocybe Cubensis
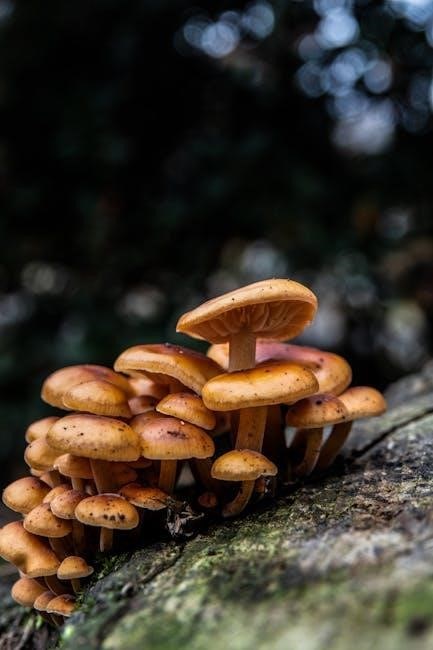
Psilocybe cubensis is one of the most common and widely distributed psilocybin-containing mushrooms. Native to tropical and subtropical regions‚ it thrives in grassy areas‚ dung‚ and rich soil. The cap‚ typically 1-8 cm in diameter‚ ranges from conic to convex‚ often bruising blue when damaged. The stem is white‚ slender‚ and hollow‚ measuring 4-10 cm tall. Spores are dark brown to purple-black. Known for its adaptability‚ P. cubensis is popular in both natural foraging and indoor cultivation. Its psychoactive compounds make it a focal point in research and cultural practices worldwide.
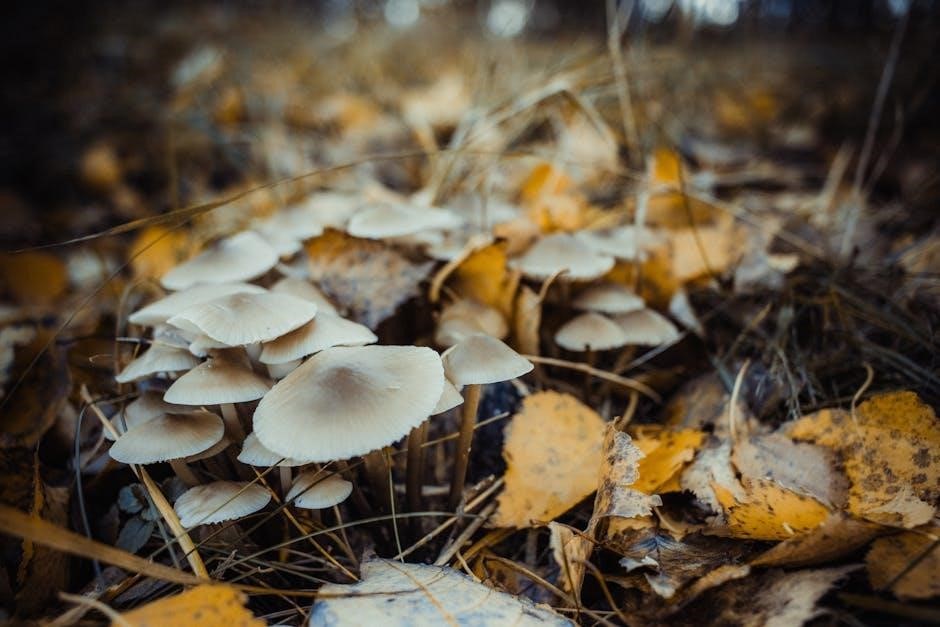
5.2 Psilocybe Semilanceata (Liberty Cap)
Psilocybe semilanceata‚ commonly known as the Liberty Cap‚ is a potent psilocybin mushroom native to Europe and North America. It features a small‚ conical cap‚ typically 0.5–2 cm in diameter‚ with a cream to light-brown color and distinctive striations. The slender stem is white‚ measuring 2–4 cm tall‚ and often curves slightly. When bruised‚ it turns blue‚ a key identification feature. The gills are narrow and crowded‚ producing dark-brown to purple-black spores. Liberty Caps thrive in grassy fields‚ especially in autumn. Their small size and potent effects make them highly sought after by enthusiasts and researchers alike.
5.3 Psilocybe Cyanescens
Psilocybe cyanescens is a highly potent species known for its vibrant blue-gray cap‚ which often fades to a lighter gray as it matures. The cap is typically 1.5–4 cm in diameter and convex to bell-shaped. The stem is slender‚ measuring 3–6 cm tall‚ and white to light-gray in color. Key features include a wavy cap edge and a tendency to bruise blue when handled. It thrives in woodchip-rich environments‚ particularly in temperate regions of North America and Europe; This species is celebrated for its robust psilocybin content‚ making it a favorite among experienced foragers and researchers studying its potent effects.
5.4 Psilocybe Azurescens
Psilocybe azurescens is a highly potent species known for its striking azure-blue cap‚ which often fades to a lighter blue or gray as it matures. The cap is typically 3–10 cm in diameter‚ convex to umbilicate‚ and features a prominent umbo. The stem is long and slender‚ measuring 6–12 cm tall‚ with a white to light-blue base. This species thrives in coastal regions‚ particularly in sandy or dung-rich areas. A key identifier is its intense blue bruising‚ which is more pronounced than in other species. P. azurescens is renowned for its high psilocybin content and resilience in harsh environments‚ making it a prized find for experienced foragers.
5.5 Psilocybe Tampanensis
Psilocybe tampanensis is a lesser-known yet potent species native to the southeastern United States. Its cap is small‚ typically 1–2.5 cm in diameter‚ with a convex to bell-shaped appearance and a brown to tan color. The stem is slender‚ measuring 2–6 cm tall‚ and often curved. This species is notable for its rare habitat‚ typically growing in nutrient-rich soil or dung. A distinguishing feature is its dark brown to purplish-brown spore print. P. tampanensis is highly regarded for its strong psychoactive properties and is often sought after by experienced enthusiasts. Its limited geographical range adds to its allure in mycological circles.
Lookalike Species
Several mushrooms resemble psilocybin species but are highly toxic‚ such as the death cap and destroying angel. Accurate identification is crucial to avoid deadly poisoning risks.
6.1 Poisonous Mushrooms That Resemble Psilocybin Species
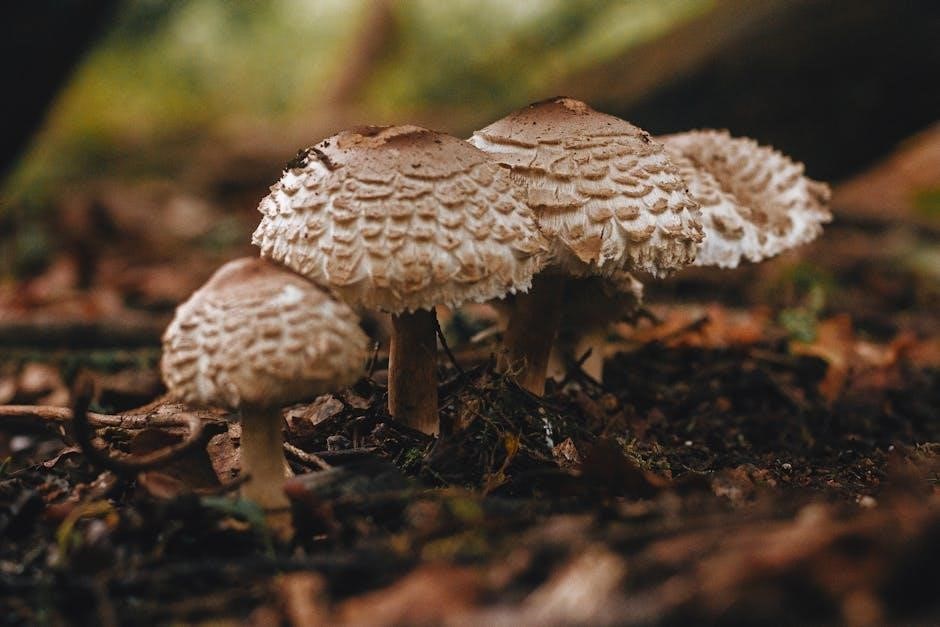
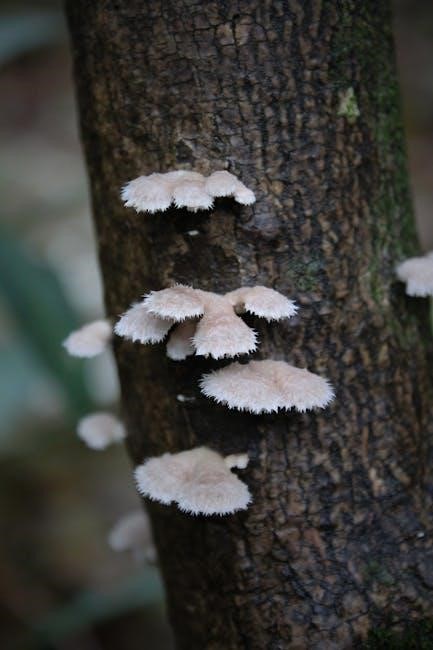
Several dangerous mushrooms closely resemble psilocybin species‚ posing significant risks. The death cap (Amanita phalloides) and destroying angel (Amanita virosa) are highly toxic lookalikes. They often grow in similar habitats and can mimic the size and shape of psilocybin mushrooms. Other poisonous species‚ such as Conocybe filaris and Galerina marginata‚ also share physical characteristics that make identification challenging. These mushrooms contain deadly toxins like alpha-amanitin‚ which can cause liver and kidney failure if ingested. Misidentification can lead to severe illness or death‚ underscoring the importance of expert-level identification skills for safe foraging.
6.2 Key Differences for Safe Identification
To safely identify psilocybin mushrooms‚ focus on distinct characteristics. Look for features like cap size‚ shape‚ and color‚ as well as bruising reactions. Psilocybin mushrooms often exhibit bluish hues when bruised‚ while poisonous species like the death cap lack this trait. Habitat is another critical factor; psilocybin mushrooms typically thrive in grassy‚ nutrient-rich areas‚ whereas toxic species may grow near trees or in varied environments. Understanding these differences is crucial for avoiding dangerous lookalikes.
Examine gill attachment‚ spore color‚ and stem characteristics. For example‚ Psilocybe semilanceata has a bell-shaped cap and dark spore print‚ unlike toxic species with white gills. Always consult expert guides or field experts for accurate identification to ensure safety.
Safety and Risks
Psilocybin mushrooms pose health risks‚ including allergic reactions and adverse effects. Misidentification can lead to poisoning‚ emphasizing the need for accurate expertise in handling these fungi.
7.1 Potential Health Risks
Psilocybin mushrooms can pose significant health risks‚ especially if misused or misidentified. Adverse effects include intensified heartbeat‚ nausea‚ and psychological distress. Allergic reactions‚ though rare‚ can be severe. The psychoactive compounds can interact with medications or worsen underlying mental health conditions. Children‚ pregnant women‚ and individuals with certain medical histories should avoid consumption. Responsible use and expert guidance are crucial to mitigate these risks and ensure safe experiences.
7.2 Allergic Reactions and Adverse Effects
Allergic reactions to psilocybin mushrooms are rare but can occur‚ manifesting as skin rash‚ itching‚ or swelling. Adverse effects may include gastrointestinal discomfort‚ diarrhea‚ or headaches. In some cases‚ users experience panic attacks‚ paranoia‚ or intensified emotions‚ particularly in individuals with preexisting mental health conditions. Hypersensitivity or allergic responses to spores or cap compounds can also trigger reactions. Proper identification and caution are essential to minimize these risks.
Cultivation and Growth
Cultivating psilocybin mushrooms requires specific substrates‚ spores‚ and controlled environments. Maintaining humidity and sterilization is crucial for healthy growth‚ ensuring optimal conditions for mycelium development and mushroom formation.
8.1 Indoor vs. Outdoor Cultivation
Indoor cultivation offers precise control over temperature‚ humidity‚ and light‚ ideal for species like Psilocybe cubensis. Substrates such as straw or compost are commonly used‚ with humidity maintained at 70-80%. Outdoor cultivation mimics natural habitats‚ often using wood chips or compost beds. Species like Psilocybe semilanceata thrive in pastures or forests. Indoor setups provide higher yields and consistency‚ while outdoor methods align with natural growth cycles. Both require sterilization and spore inoculation but differ in complexity and environmental predictability.
8.2 Substrates and Growing Conditions
Psilocybin mushrooms thrive on diverse substrates‚ including straw‚ compost‚ wood chips‚ and grains. Pasteurization or sterilization is essential to eliminate contaminants. Optimal growing conditions vary by species but generally require high humidity (70-80%) and consistent temperatures (70-75°F for fruiting‚ 75-80°F for colonization). Aeration and light exposure are critical for mycelium growth and fruiting. Substrates must be nutrient-rich‚ with a pH balanced between neutral and slightly acidic. Outdoor substrates like enriched wood chips or compost beds mimic natural habitats‚ while indoor setups often use sealed bags or containers for controlled environments. Proper substrate preparation ensures healthy mycelium colonization and abundant fruiting. Regular monitoring of moisture and contamination is vital for successful cultivation.
8.3 Legal and Ethical Considerations
The cultivation and possession of psilocybin mushrooms are illegal in many countries due to their psychoactive properties. In regions where they are legal‚ such as some parts of the U.S.‚ strict regulations apply. For example‚ in Oregon‚ psilocybin is legal for therapeutic use under licensed programs‚ but retail sale remains prohibited. Importation often requires permits and licenses‚ as seen in Canada‚ where psilocybin must be imported by licensed dealers with proper permits. Ethical considerations include responsible use‚ avoiding over-harvesting wild species‚ and ensuring sustainable practices. Users must adhere to local laws and respect the environmental and cultural impact of mushroom cultivation and foraging.
Historical and Traditional Use
Psilocybin mushrooms have been used in ancient rituals and ceremonies by indigenous cultures for centuries‚ valued for their spiritual and healing properties; Modern interest continues to grow.
9.1 Indigenous Use in Rituals and Ceremonies
Psilocybin mushrooms have been used in sacred rituals for centuries‚ particularly by indigenous cultures in Mesoamerica. The Aztecs and Mayans revered them as sacred fungi‚ believing they facilitated communication with deities. Shamans‚ or spiritual leaders‚ would ingest these mushrooms to induce visionary states‚ seeking healing‚ wisdom‚ and guidance. Species like Psilocybe mexicana were central to these practices‚ often used in ceremonies for divination and spiritual growth. The mushrooms were considered bridges between the physical and spiritual worlds‚ playing a vital role in the cultural and religious fabric of these ancient civilizations.
9.2 Modern Recreational and Therapeutic Use
Today‚ psilocybin mushrooms are used for both recreational and therapeutic purposes. Recreational users often seek introspective experiences or enhanced creativity. In therapeutic contexts‚ research highlights their potential to treat mental health conditions like depression‚ anxiety‚ and PTSD. Clinical trials have shown promising results‚ with psilocybin-assisted therapy gaining recognition. Microdosing‚ involving small‚ non-psychedelic doses‚ is also popular for cognitive enhancement and mood improvement. Legal changes in some regions‚ such as Oregon‚ have paved the way for regulated therapeutic use. However‚ caution is advised due to potential risks‚ including psychological distress in vulnerable individuals. Modern use balances tradition and scientific exploration.
Psilocybin and Psilocin
Psilocybin and psilocin are the primary psychoactive compounds in magic mushrooms. Psilocybin is converted into psilocin in the body‚ producing hallucinogenic effects by interacting with serotonin receptors in the brain.
10.1 Chemistry and Pharmacology
Psilocybin and psilocin are serotonergic psychedelics‚ with psilocybin converting to psilocin in the body. Psilocin binds to serotonin (5-HT2A) receptors‚ altering neural circuits and inducing hallucinogenic effects. These compounds are structurally similar to serotonin‚ allowing them to interact with brain receptors. Psilocybin mushrooms also contain trace amounts of baeocystin and norbaeocystin‚ contributing to their psychoactive properties. The guide details the chemical structures and pharmacological mechanisms‚ providing insights into how these substances produce their unique effects on perception and cognition. This understanding is crucial for both scientific research and responsible use of these powerful fungi;
10.2 Effects on the Human Brain
Psilocybin mushrooms primarily affect the brain’s serotonin system‚ particularly the 5-HT2A receptors. This interaction alters neural activity‚ leading to changes in perception‚ thought‚ and mood. Users often report vivid hallucinations‚ emotional shifts‚ and a sense of altered consciousness. Studies suggest that psilocybin can increase neural connectivity‚ potentially fostering creativity and introspection. These effects are temporary but can have lasting psychological impacts. The guide explores how these brain changes correlate with the subjective experiences of users‚ offering insights into the mushrooms’ profound influence on human consciousness and their potential therapeutic applications.
Conservation Efforts
Efforts focus on preserving habitats and promoting sustainable foraging to protect psilocybin mushrooms. Education on responsible harvesting is crucial to ensure their survival and ecological balance.
11.1 Threats to Psilocybin Mushroom Populations
Psilocybin mushrooms face threats from habitat destruction‚ over-foraging‚ and climate change. Urbanization and agricultural expansion disrupt their natural ecosystems‚ reducing growth areas. Over-harvesting by enthusiasts and commercial pickers jeopardizes sustainability. Climate change alters soil and moisture conditions‚ affecting fungal growth. Additionally‚ pollution and invasive species degrade habitats‚ further endangering these mushrooms. Legal restrictions‚ while protecting them‚ can reduce awareness of conservation needs. Efforts to address these threats are critical to preserving psilocybin mushrooms for future generations and maintaining ecological balance.
11.2 Sustainable Foraging Practices
Sustainable foraging involves minimizing environmental impact while harvesting psilocybin mushrooms. Harvesters should avoid over-picking‚ as this can deplete local populations. It’s important to leave younger mushrooms to mature and disperse spores. Foraging in areas with abundant growth and avoiding sensitive habitats helps maintain ecological balance. Tools like knives or scissors can reduce damage to the mycelium. Timing foraging to coincide with peak fruiting ensures the best results while preserving the species. Additionally‚ being mindful of local regulations and respecting private property rights are essential for responsible and ethical foraging practices.
Psilocybin mushrooms offer profound cultural‚ scientific‚ and personal significance. This guide underscores the importance of sustainable practices‚ responsible use‚ and ethical stewardship of these fascinating fungi.
12.1 Summary of Key Points
This comprehensive guide to psilocybin mushrooms explores their global distribution‚ identification features‚ and cultural significance. It highlights the importance of accurate species recognition‚ emphasizing key characteristics like cap color‚ gill arrangement‚ and bruising reactions. The book also underscores the balance between the potential benefits of these fungi and the risks associated with misuse. By combining scientific expertise with practical insights‚ it serves as an invaluable resource for enthusiasts and researchers alike‚ fostering a deeper understanding of these fascinating organisms while promoting responsible and ethical engagement.
12.2 Final Thoughts on Responsible Use and Identification
Responsible use and accurate identification of psilocybin mushrooms are paramount to ensure safety and ethical engagement. Ethical foraging practices‚ such as sustainable harvesting‚ help preserve these species and their habitats. Legal awareness is essential‚ as regulations vary globally. Prioritizing education and caution minimizes risks‚ while fostering respect for these fungi and their cultural significance. By embracing responsible practices‚ enthusiasts can contribute to the conservation of psilocybin mushrooms and promote a deeper understanding of their role in nature and human experience‚ balancing scientific curiosity with environmental stewardship.